Step-By-Step Guide To Creating Wooden Farm Animals

Creating wooden farm animals is a great way to add a unique and personal touch to your home décor. Whether you’re looking for an interesting art project or just want to make something special, making wooden farm animal sculptures is both fun and rewarding.
With the right tools, some basic woodworking skills, and our step-by-step guide, you can create beautiful pieces of art in no time!
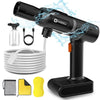
To get started on your projects, all you need is a cordless rotary tool – the most important tool for any woodworker. We’ve reviewed some of the best rotary tools on the market so that you can choose the one that suits your needs best. Once you have all your supplies ready, it's time to start crafting!
Materials
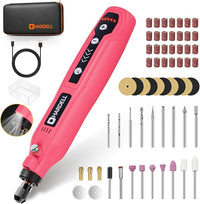
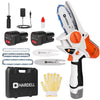
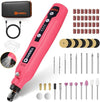
- HDRT2230 4V Mini Cordless Rotary Tool
- Diamond bits
- Sanding Band
- Sanding Paper
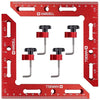
- Clamps
- Handsaw or jigsaw
- Measuring tape or ruler
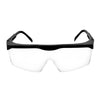
- Safety goggles and gloves
- Wooden blocks or planks in various sizes and shapes
- Sandpaper
- Wood glue
- Wood filler
- Paint or wood stain
- Brushes
- Pencil or pen for sketching design
Carving And Shaping
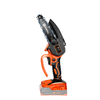
Once you have all your materials ready, you can begin carving and shaping the wood to create the desired animal figures. To do this, you will need a rotary tool such as the HDRT2230 4V Mini Cordless Rotary Tool. This powerful cordless tool is perfect for precision cutting, drilling, grinding, sanding, polishing, and more – making it an ideal choice for creating wooden farm animals.
Use of rotary tools for carving and shaping the wood
Using a rotary tool such as the HDRT2230 4V Mini Cordless Rotary Tool is essential for creating wooden farm animals. This powerful tool allows you to precisely cut, drill, grind, sand, polish, and more – making it an ideal choice for crafting intricate figures.
The diamond bits included with the rotary tool are perfect for carving and shaping the wood into the desired shapes of your farm animals. You can use the sanding bands and sandpaper to smooth out any rough edges or irregularities. Clamps are also handy when securing pieces of wood together while drilling or cutting them.
Once you have carved and shaped your pieces of wood into the desired animal figures, you can use wood glue to secure them together. Use a handsaw or jigsaw to make precise cuts when necessary.
For detailed design work, measuring tape or ruler will come in handy. And don’t forget to protect yourself with safety goggles and gloves when working with power tools!
Lastly, painting or staining your wooden farm animals will give them a realistic look. You can use wood filler to fill any cracks or blemishes in the finished product before applying paint or stains. Remember to sketch out your design first with a pencil or pen before painting it!
Tips and techniques
When creating wooden farm animals, there are various tips and techniques that can help you achieve realistic-looking results. Here are some useful tips to keep in mind:
- Use clamps to secure the wood in place while carving or shaping. This will help ensure that you create an even surface and uniform shape without any mistakes.
- Start with a larger piece of wood and carve away material until you reach the desired shape and size. Carving away material is much easier than trying to add it back in once the figure is finished.
- If you're using a jigsaw, make sure to use a blade with fine teeth for smoother cutting lines and better accuracy when creating shapes.
- When sanding down the wood, use overlapping strokes and work your way up through higher grits of sandpaper until you reach a smooth finish.
- Wood filler can be used to fill in gaps or imperfections before painting or staining your wooden figures for a more professional look.
- Paint or stain in light layers from dark to light colors, allowing each layer to dry completely before adding the next one for maximum coverage and depth of color.
- Sketch out your design on paper first before transferring it onto the wood – this will give you an idea of how the final product should look so it's easier to replicate on your material of choice.
Sanding And Finishing
The sanding and finishing process is essential to achieving a smooth and polished finish on your wooden farm animals. Sanding not only removes material but also makes it easier to remove any bumps or imperfections that may have occurred during the carving and shaping stages.
It also helps to create a uniform texture across the entire figure, giving it a more professional look.
When selecting the appropriate sandpaper grits and accessories for sanding your wooden figures, consider the type of wood you are working with and the desired outcome. For softwoods such as cedar, pine, or spruce, start with a medium-grit paper (150-180) followed by progressively finer grits until you reach a smooth finish.
For hardwoods like oak or walnut, begin with medium-grit paper (100-120), then move up through to extra-fine (220–320) for a finely polished result.
For best results, use both wet and dry sanding methods – wet sanding will help remove minor imperfections faster while dry sanding provides greater control over the amount of material being removed from the piece.
When using electric power tools such as orbital sanders or air polishers, be sure to use low speeds to not overheat or damage the wood surface. Finally, use an orbital sander to give your figures an extra shine before applying paint or stain for added realism and depth of color!
Application of a finish to protect and enhance the wood
Once your wooden farm animals are carved and sanded to the desired shape and finish, it's time to apply a protective finish that will protect the wood from wear and tear and enhance its natural beauty.
Depending on the type of wood used, there are various finishes to choose from:
Oil-based finishes
Oil-based finishes provide a natural sheen that enhances the color of the wood without making it too shiny. These types of finishes penetrate deep into the pores of the wood for maximum protection against moisture and other elements.
Varnish
Varnish is a clear, glossy finish that adds protection and shines to your wooden figures. It’s best applied in several thin coats, allowing each coat to dry completely before adding another one for maximum coverage and depth of color.
Wax
If you're looking for an aged or antique look, wax can be applied over any existing finish to add a soft patina and subtle sheen. This is a great way to give your wooden animal figures an extra touch of character!
Polyurethane
Polyurethane is a synthetic finish that provides superior durability against water, scratches, and everyday wear and tear. It also comes in both matte or glossy finishes, so you can choose whichever you prefer depending on the look you’re going for.
No matter which finish you choose, be sure to read the instructions carefully before applying it as some require additional steps such as sanding between coats or using special applicators for best results.
Let each coat fully dry before adding additional layers as this will help ensure even coverage and longer-lasting protection from everyday use.
Encouragement
The rotary tool is an essential tool for creating wooden farm animals as it allows for intricate carving and shaping. When selecting the right model for your project, it’s important to consider the size of your workpieces, the type of material you will be working with (wood, plastic, metal, etc.), and the specific tasks you plan on performing.
A cordless rotary tool is often ideal as it offers greater flexibility when working with tight spaces or on projects that require portability.
When looking for the best cordless rotary tool to suit your needs, look out for models that offer a variety of speeds and attachments as well as a comfortable grip.
The right model will also have plenty of power and long-lasting battery life so that you can work uninterrupted without having to worry about running out of charge mid-way through a project.
Once you have selected the best cordless rotary tool for your project, it's time to get started! Begin by preparing your wood pieces, including sawing, drilling, sanding, etc. Once all materials are prepped and ready to go, use the rotary tool to carefully carve and shape each figure according to your template or design.
You can use different burrs/bits for different effects – from roughing up surfaces to creating detailed patterns such as feathers or fur – so experiment until you find what works best for you.
Once your figures have been shaped and sanded using progressively finer grits, apply a protective finish such as oil-based varnish or polyurethane sealant before adding paint or stain if desired. With patience and practice, you'll soon be able to create beautiful wooden farm animals in no time!
