Step-By-Step Guide To Creating Diy Wooden Cards

Wooden cards are a creative and unique way to show your loved one how much you care. Whether it’s for an anniversary, birthday, or just because these personalized cards will definitely make them feel special.
With a few supplies and some simple steps, you can make your own wooden cards at home.
With the help of a rotary tool, some wood pieces, and other supplies you can easily create beautiful DIY wooden cards at home! In this step-by-step guide, we will provide all the information needed to get started on creating your own DIY wooden card creations.
From choosing the right rotary tool for the job to adding finishing touches like embellishments and paint, we have everything covered in this comprehensive guide. So let's get started crafting our very own DIY wooden cards!
Materials And Tools Needed:
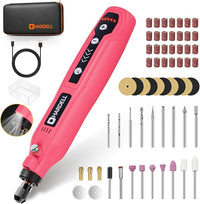
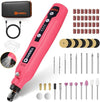
- HDRT2230 4V Mini Cordless Rotary Tool
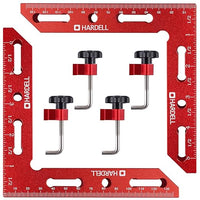
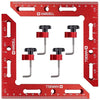
- Clamps
- Handsaw or jigsaw
- Measuring tape or ruler
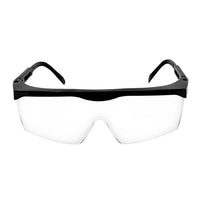
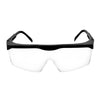
- Safety goggles and gloves
- Wooden blocks or planks in various sizes and shapes
- Sandpaper
- Wood glue
- Wood filler
- Paint or wood stain
- Brushes
- Pencil or pen for sketching design
Design And Sketch
Now that we have gathered all the materials and tools necessary for our DIY wooden card project, let's move on to the design phase. Start by sketching out a few different designs on paper. This will help you visualize your creation and make adjustments as needed.
Designing the card is an important step in creating DIY wooden cards. With careful planning and sketching, you can come up with a design that suits your style and taste. Here are some tips for getting started:
- Sketch out the design of the card on a piece of paper. Not only does this allow you to visualize the finished product, but it also gives you an outline from which to start. When drawing out the design, think about what type of message or image you want to include on the card. Do you want to add a photo? Or perhaps a poem? Use pencils, pens, markers, or even cut-outs to create your design.
- Transfer the design onto the wooden block or plank. Once you’ve drawn out your design on paper, use a ruler or measuring tape to accurately transfer it onto the wood surface. Make sure that all measurements are exact so that they will fit properly when cut and assembled later on.
Cutting And Shaping
Now that you have your design sketched, it’s time to start cutting and shaping the wood. HDRT2230 4V Mini Cordless Rotary Tool is perfect for this task as it is capable of precise and controlled cuts with minimal effort. When using the rotary tool, make sure to wear safety goggles and gloves for protection.
Cutting and shaping the wood for your DIY wooden cards is an essential step to creating beautiful and unique pieces. Here are some tips for cutting and shaping your wooden cards:
- Use a handsaw or jigsaw to cut the wood into the desired shapes. Mark out any curves, corners, and edges you want on each piece before cutting. Make sure that all measurements are precise so that they fit together correctly when assembled later on.
- For smaller details such as engraving words or symbols, use the HDRT2230 4V Mini Cordless Rotary Tool fitted with appropriate bits for grinding along edges or shapes into the wood according to your sketched designs. Place clamps along each side of where you plan to make cuts with the rotary tool for stability and control while cutting.
Sanding And Finishing
The sanding and finishing stage of creating DIY wooden cards is an important step that helps to create a smooth surface before painting or staining. Here are some tips for successful results:
- Using the HDRT2230 4V Mini Cordless Rotary Tool fitted with an appropriate bit like a sandpaper head, carefully sand away any rough spots or edges on the card creation. This will help give it a smoother surface and even appearance.
- If there are any gaps or imperfections, use wood filler to fill them in. Use a putty knife for easy application and make sure to allow enough time for drying before continuing with the next steps.
- Finish off the sanding and finishing process with a light coating of wood sealant to protect the cards against any wear or tear.
- For a bold and vibrant look, consider using an acrylic-based paint such as the HDRT2230 4V Mini Cordless Rotary Tool fitted with appropriate bits in the desired colors. Begin by applying one even coat of paint over the entire wooden card and make sure to allow it to dry completely before adding additional coats. For best results, use multiple thin coats of paint rather than one thick layer for long-lasting vibrancy and protection from wear.
- For a more subtle and natural look, opt for a wood stain instead. Make sure to apply the stain in an even layer and allow it to set before varnishing or sealing the card with a protective coating. This will help ensure your DIY wooden cards have a lasting finish that will stand up to time and wear.
Personalize The Card
Adding a personal touch to your DIY wooden card is what truly makes it one of a kind. The HDRT2230 4V Mini Cordless Rotary Tool is perfect for adding these custom details.
- Engraving: Use the engraving bit on your rotary tool to carve names, dates, or personal messages into the surface of your card. This step will require a steady hand and patience, but the end result will be well worth it.
- Painting: If you want to add some color to your card, consider painting it. Prep the surface with your rotary tool by lightly sanding it. This will help the paint to adhere better. Once the surface is prepped and clean, you can use a brush to apply acrylic paint in your chosen colors.
- Adding Embellishments: Finally, consider attaching embellishments to your card for a 3D effect. This could be anything from small wooden shapes to rhinestones or beads. Use a strong adhesive to secure these additions to your card.
These steps will help you create a unique, heartfelt message for your loved one. The versatility of the HDRT2230 4V Mini Cordless Rotary Tool will make this project both efficient and enjoyable. With some creativity and patience, you'll end up with a beautiful, personalized wooden card that will be cherished for years to come.
Cutting, Grinding, and Polishing With the HDRT2230 4V Mini Cordless Rotary Tool
The HDRT2230 4V Mini Cordless Rotary Tool is an efficient and compact tool that is perfect for making precise cuts, grinding edges, and polishing surfaces of your DIY wooden cards. This tool is cordless, making it easy to maneuver around your workspace without being restricted by a power cord.
Here's how you can use the HDRT2230 4V Mini Cordless Rotary Tool in your project:
- Cutting: Attach the cutting wheel to your rotary tool. Use clamps to secure the wood,sketched outlines as a guide. Apply the rotary tool smoothly and steadily to avoid any mishaps. Remember, safety first! Always wear safety goggles and gloves during this process.
- Grinding: Once your pieces are cut to shape, switch your rotary tool attachment to a grinding bit. This will allow you to smooth out any rough edges or to create intricate details on your wooden cards. The grinding bit is especially useful for rounding off corners and shaping unique contours in your design.
- Polishing: After all the cutting and grinding is done, it's time to polish. Attach a polishing pad or bit to your rotary tool. This will help to give your wooden card a professional, finished look. You can also use the polishing bit to prepare the surface of your card for painting or staining.
Remember to pause and assess your work often. Making minor corrections as you go can save you a lot of effort in the final stages of your project.
Conclusion
Creating DIY wooden cards can be an enjoyable and rewarding experience. With the help of a cordless rotary tool such as the HDRT2230 4V Mini Cordless Rotary Tool, you will have all of the tools necessary to cut, shape, sand, and finish your card creations with ease.
This versatile tool allows for precise cutting bits or engravers that enable intricate details while its variable speed control feature provides smooth operation and excellent maneuverability when adding fine details to your customized pieces.
With the help of this tool, you will be able to create one-of-a-kind wooden cards that can be used as special gifts or treasured keepsakes.
Whether you are looking to make unique patterns in wood surfaces or personalize designs with engraved messages, let this mini rotary tool become part of your arsenal so that you can create beautiful masterpieces every time!
