Revamp Your Ride: A Guide To Cleaning And Polishing Your Bike’s Rear Derailleur With A Rotary Tool

For bike enthusiasts, nothing beats the feeling of a freshly cleaned and polished ride. But maintaining your bike's components can be time-consuming and difficult. One of the most important parts to keep in top condition is the rear derailleur.
It plays an essential role in changing gears quickly and smoothly - if it’s not working properly, you won’t get far! Thankfully, with a rotary tool, cleaning and polishing your rear derailleur is easier than ever before.
In this guide, we will explain how to use a rotary tool to give your bike's rear derailleur that extra sparkle. So let's get started!
Materials Needed
Before beginning, it’s important to collect the necessary materials.
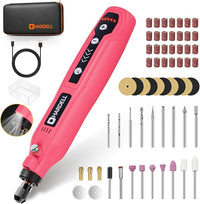
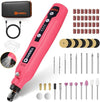
- HDRT3110 160W Corded Variable-Speed Rotary Tool
- Stainless Steel Brush and large sanding band
- Soft cloths or microfiber towels
- Bike with the dirty rear derailleur
- Small container with degreaser and water
- Small container with water
- Ball bearing grease
- Optional
- Disposable gloves
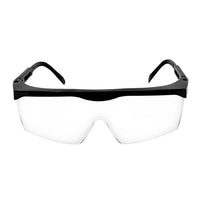
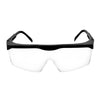
- Safety goggles
Preparation
It is important to be safe when using the Hardell rotary tool. Before you start, make sure you have on safety goggles and disposable gloves. That way, your eyes and hands will stay safe when you use the tool.
Place the bike on a flat surface, making sure that it is held firmly in place. This will ensure that you have steady control of the bike while working on it.
Cleaning and Polishing Process
Now that you have all the materials and equipment necessary, it’s time to begin the cleaning and polishing process. Before starting, make sure to read through all steps thoroughly to ensure your safety and success.
Remove the wheel and undo the derailleur cable
Start by removing the rear wheel of the bike, which will provide you with easier access to the rear derailleur. Undo the cable from its anchor point on the frame and unscrew it from the shifter. You may need a pair of pliers or an Allen key to help you with this step.
Unthread the chain and remove the derailleur
After you have successfully removed the derailleur cable, use a pair of pliers or an Allen key to unthread the chain from its gears. With both sides of the chain unhooked, slowly and carefully slide the derailleur out from its mount on the frame. Be sure to place it in a safe location for further cleaning and polishing.
Disassemble the derailleur
Disassembling the rear derailleur involves removing the cage, pulley wheels, and other components. Use a pair of pliers to carefully remove the bolts from the cage and set them aside.
Then, gently pry out each of the pulley wheels with a small flat-head screwdriver, being sure not to damage any of their parts in the process. Once all parts have been removed, separate them into individual pieces for easy cleaning and polishing.
Clean and degrease the derailleur parts
Now that the parts have been disassembled, it's time to give them a thorough cleaning. To do this, you will need a small container filled with degreaser and water. Start by soaking the individual pieces of the derailleur in this mixture for 15-20 minutes. This will help loosen any dirt or debris that has built up over time.
Then, take each piece out of the container and use a stainless steel brush with some elbow grease to scrub away any stubborn grime or grease. Finally, rinse each piece off with water and place them onto a soft cloth or microfiber towel for drying.
De-rust your derailleur parts
After the parts have been cleaned, it's time to de-rust them. Begin by taking a large sanding band and attaching it to the Hardell rotary tool. Use the tool to carefully sand down any rust or corrosion on each of the individual pieces. When you're finished, wipe away any leftover dust with a soft cloth.
Polish the derailleur parts
Now that all rust and debris have been removed, you can start polishing each part of the derailleur. Use a clean, damp cloth to apply a small amount of metal polish to each piece. Then, use the Hardell rotary tool with a polishing wheel attachment to buff and shine each part.
Once you have finished this step, use another soft cloth to clean off any residue and admire your work!
Put the derailleur back together
Start by taking all the pieces and lining them up in the correct order. Reattach the pulley wheels to their respective mounts and tighten them with a pair of pliers. Then, position the cage over the pulley wheels and re-secure it with its bolts.
Next, take the chain and thread it back into its gears. Finally, reattach the derailleur cable to its anchor point on the frame and tighten it with a pair of pliers or an Allen key.
Re-install the wheel and test
Now that the derailleur is back together, it's time to reinstall the wheel. Use a wrench to securely attach the wheel back onto the frame and make sure that all nuts and bolts are tightened properly.
Once this is done, give the bike a test ride to see if everything works as expected. If any issues arise, you may need to make some final adjustments to the derailleur.
Adjust the derailleur
After the wheel has been re-installed, it's time to adjust the derailleur. Start by loosening the cable anchor bolt and adjusting the limit screws. The low-limit screw should be adjusted so that the chain doesn't fall off when in the smallest gear and the high-limit screw should be adjusted so that the chain doesn't over shift onto the largest gear.
Once these adjustments have been made, re-tighten the cable anchor bolt and test-ride your bike again to make sure everything is working correctly.
Maintenance Tips
Now that you have your rear derailleur back in tip-top shape, there are a few easy maintenance tips you can follow to ensure it stays that way for years to come.
- Regularly inspect the derailleur for signs of wear and tear. Pay close attention to the pulley wheels and any small parts that may be loose or damaged. Additionally, if you feel any grinding or jumping in the gears when shifting, it is likely time to replace your derailleur entirely.
- Lubricate the pulley wheels with a lightweight lubricant every few months to help keep them running smoothly. Additionally, apply a light coating of grease along the gear teeth to reduce friction and noise when pedaling.
- Clean your rear derailleur after each ride to remove dirt and debris that can lead to premature wear and tear on its components. To do this, use a degreaser mixture and a soft brush or cloth to scrub away any grime or grease buildup. Then, rinse off all parts with warm water before drying them off with a microfiber towel.
- If you notice any corrosion on your derailleur components, use an abrasive sanding band attachment on your rotary tool to carefully buff away any rust spots. Once all rust has been removed, polish each part with a metal polish for an even shinier finish.
- When working with any type of bike component, always make sure to use the proper tools and protective gear. If you are ever unsure about how to complete a task, be sure to seek professional help from an experienced bicycle mechanic.
Following these simple maintenance tips will help you keep your rear derailleur in top condition for years to come!
Benefits Of Regular Maintenance
The benefits of Regular Maintenance are as follows:
- Prevents premature wear and tear on components
- Reduces friction and noise when pedaling
- Improves the overall performance of the bike
- Helps to prolong the life of the bike's components
Regularly maintaining your rear derailleur can help you keep it in top condition for years to come. Taking the time to clean and lubricate its components will ensure that all parts are working correctly and smoothly, thereby improving the overall performance of your bike.
Additionally, regular maintenance can help to identify any potential problems before they become serious issues, which helps to prolong the life of the bike's components. With a little bit of care and attention, you can maximize your bicycle's performance for many miles ahead!
Conclusion
Overall, cleaning and polishing your rear derailleur with a rotary tool is an easy way to keep it in top condition. With the right tools and supplies, you can quickly get rid of any dirt or debris buildup that may be causing issues with shifting or noise while pedaling.
Regular maintenance will help protect against rusting and corrosion, which can lead to premature wear on components over time. By following these steps for keeping your rear derailleur clean and polished, you'll enjoy smoother shifts and quieter rides for many years to come!
