How To Use A Rotary Tool For Carving Pumpkins

Carving pumpkins is a fun and creative tradition that people of all ages enjoy. If you want to take your pumpkin carving game up a notch, why not try using a rotary tool? A rotary tool is an incredibly versatile piece of equipment that can be used for many projects, such as woodworking, engraving, sharpening tools, and more.
With the right attachments and safety precautions, it's also perfect for creating intricate designs on your pumpkin. So if you want to make your jack-o'-lantern stand out this Halloween season, read on to learn how to use a rotary tool for carving pumpkins!
Required Materials
Before you begin carving, it's important that you have all the necessary materials on hand.
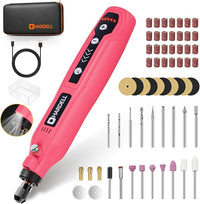
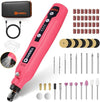
- HDRT2220 4V mini cordless rotary tool
- Drill bits
- Diamond bits
- A scraper or spoon for cleaning out the pumpkin
- A printed or sketched design
- Masking tape or transfer paper
- Clear tape
- A pumpkin
- Newspaper or a drop cloth
- Rubbing alcohol or bleach solution
- Cooking oil or petroleum jelly
- LED lights or tea lights
- Safety goggles
- Gloves
- Dust mask
Preparing The Pumpkin For Carving
Before you start using your rotary tool to carve your pumpkin, you'll need to prepare it. Start by cleaning out the inside of the pumpkin with a spoon or scraper; then, sanitize it with a rubbing alcohol or bleach solution. This will help make sure that any bacteria or mold on the surface of the pumpkin is removed.
Next, use masking tape or transfer paper to trace your design onto the pumpkin's surface. Secure the design in place with clear tape if necessary. Once your design is in place, it's time to get ready for carving!
Creating Your Design
Now it's time to create your design! Begin by selecting the appropriate drill bit or diamond bit for the job. It's important to select a bit that is the same size or slightly larger than the lines of your design. This will ensure that you don't accidentally go too deep into the pumpkin as you carve.
Once you have selected the right bit, turn on your rotary tool and begin carving along the lines of your design. Be sure to start slow and use light pressure until you get used to how the tool works.
Make sure to pay attention to the depth of each line and adjust your pressure accordingly. You want to make sure that all of your lines are even and consistent in-depth for an overall cohesive look.
Carving The Pumpkin With A Rotary Tool
Using the HDRT2220 4V Mini Cordless Rotary Tool to carve your pumpkin is an efficient and effective way to create detailed and intricate designs. Here are the step-by-step instructions for carving a pumpkin with a rotary tool:
- Assemble the HDRT2220 4V Mini Cordless Rotary Tool by attaching the drill bits or diamond bits to it. Add a few drops of cooking oil or petroleum jelly to each bit beforehand to reduce friction and prevent overheating during use.
- Put on safety gear such as safety goggles, gloves, and a dust mask before plugging in your rotary tool and powering it on.
- Start by tracing your design onto the pumpkin's surface with masking tape or transfer paper and securing it in place with clear tape if necessary.
- Select the appropriate drill bit or diamond bit for the job; make sure to select a bit that is the same size or slightly larger than the lines of your design so you don't accidentally go too deep into the pumpkin as you carve.
- Turn on your rotary tool and carefully begin carving along the lines of your design. Start slow and use light pressure until you get used to how the tool works, then adjust accordingly as necessary for an overall cohesive look.
- When you have finished carving, take a moment to admire your work before moving on to lighting up your creation! If necessary, use a toothpick or interdental brush to clean out any remaining bits of pumpkin flesh from inside each line before lighting up your masterpiece with LED lights or tea lights.
Tips For Achieving Different Textures And Depths With The Rotary Tool
Using a rotary tool is an efficient and effective way to carve intricate designs into pumpkins. When using this tool, there are several tips you can follow to achieve different textures and depths with your carving:
- Use different types of drill bits or diamond bits for various levels of detail and texture. For example, finer details can be achieved by using a smaller bit that creates shallow lines, while larger bits create deeper and wider grooves.
- To reduce friction when drilling and prevent overheating of the tool, add a few drops of cooking oil or petroleum jelly to each bit before attaching them to the rotary tool.
- Start with light pressure until you get used to how the tool works, then adjust accordingly as necessary for an overall cohesive look. You can also experiment with different speeds and pressures to create various textures on your pumpkin's surface.
- Take breaks often; working for long periods of time may cause fatigue which could lead to sloppiness or accidents with your rotary tool!
Common Mistakes To Avoid While Carving
Common mistakes to avoid while carving a pumpkin with a rotary tool include:
- Carving too deep - for detail, use a bit that is the same size or slightly larger than the lines of your design so you don't accidentally go too deep into the pumpkin as you carve.
- Not wearing safety gear - always wear safety goggles, gloves, and a dust mask when using the rotary tool as it can be dangerous if mishandled.
- Using old tools - check to make sure your rotary tool's bits are in good condition before beginning your project; if they show signs of wear or damage, replace them before carving!
- Overheating - add a few drops of cooking oil or petroleum jelly to each bit beforehand to reduce friction and prevent overheating during use.
- Not cleaning out pumpkin flesh - after finishing the carving, use a toothpick or interdental brush to clean out any remaining bits of pumpkin flesh from inside each line before lighting up your masterpiece with LED lights or tea lights.
Finishing Touches
Once you have finished carving your pumpkin with the rotary tool, it's time to give it the finishing touches!
Cleaning up the pumpkin from any remaining debris is essential for making sure your masterpiece looks neat and professional. Here are some tips for cleaning up and adding extra details to your work:
- Use a toothpick or interdental brush to carefully remove any remaining bits of pumpkin flesh left behind after carving. This will help ensure that the inside of each line is free of debris, which will make lighting up your masterpiece much easier.
- To add extra details or texture, try using different drill bits or sandpaper depending on what kind of look you want to achieve.
- If desired, you can use acrylic paints or other decorations such as glitter, sequins, and feathers to further enhance your design! These will often require special sealants and varnishes in order to keep them secured against moisture and humidity for long periods of time.
- Finally, light up your masterpiece with LED lights or tea lights for an extra spooky touch! Doing so will not only allow you to show off your hard work, but it may also give passersby a fright if you’re planning on displaying it outdoors!
Displaying Your Carved Pumpkin
Once you've finished carving your pumpkin with the rotary tool, it's time to show off your masterpiece! Here are some ideas for displaying your finished pumpkin:
- Place your pumpkin on a pedestal or outdoor table with lights underneath it for an illuminated display. This will make sure that everyone can admire your work and appreciate the artistry that went into it!
- Create a scene around the pumpkin by adding other decorations such as hay bales, gourds, dried cornstalks, and small pumpkins in varying shapes and sizes to give a spooky atmosphere. You can also use LED lights in various colors to further enhance the look of the scene.
- If you want to get creative, try making a jack-o'-lantern display by combining several carved pumpkins together with some lights and props like headstones or ghosts for a truly eerie effect!
Tips For Preserving Your Carved Pumpkin for Longer-lasting Use
To make sure that your carved masterpiece lasts longer than that, follow these tips:
- Store the pumpkin away from direct sunlight as much as possible – this will help prevent the skin from drying out too quickly and decaying faster than usual.
- Apply petroleum jelly or cooking oil around all cutting edges of the pumpkin before carving – this will act as a sealant, preventing moisture from entering inside the lines of the design, which could cause them to become distorted over time.
- Sprinkle cornstarch inside each line after carving – this will help absorb any excess moisture while also preventing mold growth which can occur when certain types of vegetables (like pumpkins) are exposed to damp environments for long periods of time.
- Coat all cut surfaces of the carved pumpkin with lemon juice or vinegar mixed with water– this will help keep insects away from eating away at your work of art! Lemon juice is also known for its preservative properties, which can help keep your design looking fresh longer.
- Finally, you can use artificial preservatives like polyurethane spray or liquid wax products, which can provide extra protection against moisture damage and fading colors over time – just be sure to check labels carefully before using them on food items like pumpkins!
