How To Upgrade Coconut Shells Into Plant Hangers

In an era where sustainability is not just a buzzword but a necessity, repurposing items that would otherwise be discarded is a creative and eco-friendly way to reduce waste. One such item is the humble coconut shell, which can be transformed into a unique and stylish plant hanger.
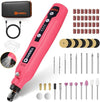
This article will guide you through the process of upgrading coconut shells into plant hangers using the HDRT3120 LCD Screen Corded Variable-Speed Rotary Tool.
This project not only gives a second life to coconut shells but also adds a tropical touch to your home decor.
The steps involved in this process are simple and straightforward, making it a perfect DIY project for both beginners and experienced crafters.
Understanding The HDRT3120 LCD Screen Corded Variable-Speed Rotary Tool
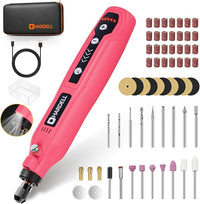
The HDRT3120 LCD Screen Corded Variable-Speed Rotary Tool is a versatile and powerful tool that can be used for a variety of DIY projects. This tool comes with 178 accessories for cutting, sanding, drilling, grinding, and polishing, making it an all-in-one solution for your crafting needs. The tool features a 135W motor with 6 variable speeds and an LED display, allowing you to adjust the speed according to the task at hand.
The Rotary Tool is particularly useful for upgrading coconut shells due to its grinding and polishing capabilities. The tool's speed can be adjusted from 10,000 to 35,000 RPM, allowing you to achieve the desired texture and shape for your coconut shell plant hangers. The tool also comes with a flex shaft, which is as convenient as using a pen, making it ideal for detailed work.
However, it's important to remember that safety comes first when working with power tools. Always wear protective gear, such as safety glasses and gloves, and work in a well-ventilated area to avoid inhaling dust.
Preparing The Coconut Shells
Before you start working on the coconut shells, you need to source and select suitable ones for your project. Look for shells that are relatively smooth and free of cracks. Once you've selected your shells, they need to be cleaned and sanitized. This can be done by soaking the shells in a solution of warm water and mild detergent, then scrubbing them with a brush to remove any dirt or debris.
After cleaning, the shells need to be dried thoroughly before you start grinding them. This can be done by placing them in a sunny spot for a few days or using a hairdryer if you're in a hurry. Make sure the shells are completely dry, as any moisture can interfere with the grinding process.
Grinding The Coconut Shells
Before we delve into the specifics of grinding the coconut shells, it's crucial to understand the importance of setting up the speed of the Rotary Tool correctly. The speed at which you grind can significantly influence the final outcome, affecting the texture and shape of your coconut shell plant hangers. Let's explore how to set up the speed of the Rotary Tool for this task.
Setting Up The Speed Of The Rotary Tool For The Task
Once your coconut shells are clean and dry, it's time to start grinding. The HDRT3120 LCD Screen Corded Variable-Speed Rotary Tool allows you to adjust the speed according to the task at hand.
For grinding coconut shells, a medium speed is usually sufficient. The tool's LED digital display screen makes it easy to see exactly what gear the rotary tool is in, ensuring you have the right speed for the job.
Adjusting The Rotary Tool's Speed And Settings For Optimal Results
As you start grinding, you may need to adjust the tool's speed and settings to achieve the desired results. If you're new to using a rotary tool, it's a good idea to practice on a spare piece of material first. This will help you get a feel for the tool and how it operates at different speeds. Remember, it's always better to start slow and gradually increase the speed as needed.
Step-by-step Instructions For Grinding The Coconut Shells
After setting up the speed of the Rotary Tool, the next step is to hold and position the coconut shell correctly. This is a crucial step as it not only ensures your safety but also affects the quality of your work. Let's discuss how to hold and position the coconut shell for optimal results.
- Proper holding and positioning of the shells: Hold the coconut shell firmly but not too tightly. You want to have control over the shell without straining your hand. Position the shell so that the area you're grinding is easily accessible.
- Safety measures while using the grinder: Always wear protective gear, such as safety glasses and gloves, when using the grinder. Make sure your work area is well-ventilated and free of any flammable materials.
- Achieving the desired texture and shape for the plant hangers:Start by grinding the outer surface of the shell to remove any rough spots. Then, work on the inner surface to create a smooth, even surface for your plants. If you want to create a specific shape for your plant hanger, sketch it out on the shell before you start grinding.
Finishing And Polishing
After grinding, the next step is to finish and polish the coconut shells. Start by sanding the shells to smooth out any rough spots left from grinding. This can be done using the sanding attachments that come with the HDRT3120 LCD Screen Corded Variable-Speed Rotary Tool.
Once the shells are smooth, clean them to remove any debris or dust. This can be done by wiping them with a damp cloth or rinsing them under warm water. Make sure to dry the shells thoroughly after cleaning.
Polishing the shells not only enhances their appearance but also helps to protect them from wear and tear. The HDRT3120 LCD Screen Corded Variable-Speed Rotary Tool comes with a variety of polishing attachments that can be used to achieve a glossy or matte finish, depending on your personal preference.
Creating Hanging Mechanisms
Once your coconut shells are polished and looking beautiful, it's time to create the hanging mechanisms. The method you choose for hanging your plant hangers will depend on your personal preference and the materials you have available.
One option is to drill holes in the top of the coconut shells and thread a rope or chain through the holes. This can be done using the drilling accessories that come with the HDRT3120 LCD Screen Corded Variable-Speed Rotary Tool. Make sure to choose a drill bit that is the right size for your rope or chain.
Another option is to attach hooks to the top of the coconut shells. This can be done using a strong adhesive or by screwing the hooks directly into the shells. If you choose to screw the hooks in, make sure to pre-drill the holes to prevent the shells from cracking.
Once your hanging mechanisms are in place, you can attach ropes, chains, or other materials for hanging purposes. Be creative and choose materials that complement your decor and the look of your coconut shell plant hangers.
Planting And Displaying
Now that your coconut shell plant hangers are ready, it's time to add the plants. Choose plants that are suitable for the size of your coconut shells and the conditions in your home. Succulents and air plants are great options as they require little soil and water.
Before transplanting your plants into coconut shells, prepare the plants by removing any excess soil and gently loosening the roots.
Place a layer of gravel or small stones in the bottom of the shells for drainage, then add potting soil and your plants.
Once your plants are in place, hang your coconut shell plant hangers in your desired locations. They can be displayed individually or in groups for a more dramatic effect.
Maintenance And Care
Maintaining your coconut shell plant hangers involves a few simple steps:
- Cleaning the Shells:Wipe the coconut shells with a damp cloth to remove any dust or dirt. This should be done regularly to keep your plant hangers looking their best.
- Refreshing the Appearance: If the shells start to look dull over time, you can refresh their appearance by applying a coat of clear varnish or wood oil. This will restore their shine and protect them from wear and tear.
- Watering the Plants:Make sure to water your plants regularly. The amount of water needed will depend on the type of plants you have chosen.
- Providing Light:Ensure your plants get the right amount of light. Some plants may require direct sunlight, while others may thrive in indirect light.
- Monitoring Plant Health:Keep an eye on your plants for any signs of disease or pests. If you notice anything unusual, treat the problem promptly to prevent it from spreading to other plants.
- Refreshing the Soil:Over time, the nutrients in the soil can get depleted. Refresh the soil in your coconut shell plant hangers periodically to keep your plants healthy.
Conclusion
Upgrading coconut shells into plant hangers using the HDRT3120 LCD Screen Corded Variable-Speed Rotary Tool is a fun and eco-friendly DIY project. Not only does it give a second life to coconut shells, but it also allows you to create unique and stylish home decor. So why not give it a try?
With a little creativity and the right tools, you can transform ordinary coconut shells into beautiful plant hangers that will add a tropical touch to your home.


