DIY Toy Storage Box: A Step-By-Step Guide

Are you tired of seeing toys scattered all over your house? If so, a DIY toy storage box could be the solution you’ve been looking for. Not only will it help keep your home tidy and organized, but it can also provide hours of fun for kids as they play with their new “treasure chest”.
With this step-by-step guide, you’ll find out exactly how to make a toy storage box that is perfect for any age group. From choosing the right materials to adding personalized touches like paint or stickers, we’ll show you everything you need to know about creating an adorable toy storage box that both parents and children will love!
Materials And Tools
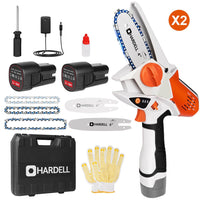
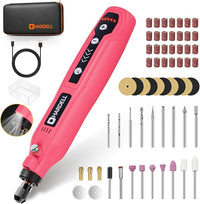
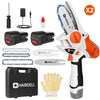
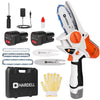
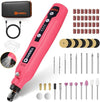
- HDRT2240 4V mini cordless rotary tool
- Sanding band
- Circular saw or jigsaw
- Measuring tape
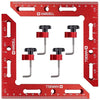
- Clamps
- Paintbrush
- Preparing the Wood:1/2 inch thick plywood or MDF
- Wood glue
- Wood screws
- Wood stain or paint
- Sandpaper
Steps
There are some steps to follow in order to make the perfect toy box. These are as follows:
Preparing the wood
Before beginning your project, it is important to make sure you are working with the right kind of wood. Using plywood or MDF that is 1/2 inch thick will provide a durable and sturdy base for the toy storage box. Once you’ve selected the type of wood, use a circular saw or jigsaw to cut it into two separate pieces that are both 12 inches by 24 inches in size.
Next, use sandpaper to smooth out any rough edges or splinters and remove any dirt or dust from the surface. Finally, apply a coat of wood stain or paint to give your box a colorful look.
Cutting the wood to size
After preparing the wood, you can begin cutting it to size. Measure and mark the desired dimensions of your toy storage box onto the two pieces of wood, making sure that each piece is exactly 12 inches by 24 inches.
Make sure to double-check your measurements before proceeding with the cutting. Using your rotary tool and sanding band, carefully cut along the marked lines to create the box’s panels.
Sanding the wood
With a rotary tool and sanding band, carefully sand the edges of the wood panels to create a smooth finish. Be sure to use even pressure as you go in order to avoid creating any bumps or dips on the surface.
To further refine the finish, switch to a finer grit sandpaper and lightly sand any areas that may have been missed.
Applying wood stain or paint
Once the wood panels have been cut and sanded, it’s time to give your toy storage box a decorative touch. Applying a coat of wood stain or paint is a great way to make the box look unique and interesting.
Before applying the stain or paint, be sure to clean the wood with a damp cloth in order to remove any dust or debris. Once dry, use a paintbrush to apply the stain or paint evenly across all surfaces. Allow your box to dry completely before continuing assembly.
Assembling the toy storage box
Now that the wood is prepped and cut to size, it’s time to assemble the toy storage box. Begin by applying a generous amount of wood glue on each corner of one piece of wood. Place the other piece of wood on top and firmly press down in order to ensure a secure bond.
Use clamps to hold the pieces in place while the glue dries. After the glue has dried, use wood screws to permanently attach the two panels together. Make sure that all screws are tightened securely so that your box will be strong and sturdy.
Reinforcing the corners
Once you have the toy storage box assembled, it is important to reinforce the corners with wood glue. This will ensure a strong bond between the two pieces of wood, and help prevent any warping or cracking over time.
To begin, apply a generous amount of wood glue to each corner of the box. Use clamps to hold the panels in place while the glue dries. Allow the glue to dry completely before proceeding with further assembly.
Adding the lid
To finish off your toy storage box, you'll need to add a lid. Begin by measuring the size of the box and cutting a piece of wood to match those dimensions. Once cut, sand down any rough edges and apply a coat of wood stain or paint if desired.
Apply a generous amount of wood glue onto the top edge of the box and carefully place the lid on top. Use a hammer to secure small nails into each corner in order to keep the lid firmly in place.
Adding the finishing touches
Once your toy storage box is assembled, you can begin to add the finishing touches. Start by adding decorative hardware like handles or hinges to the lid so that it can be easily opened and closed.
If desired, you can also drill holes into the sides of the box and thread colorful ribbons through them to create a unique look.
Sanding the edges
In order to create a smooth, polished finish on the edges of your toy storage box, use a rotary tool and sanding band. Begin by sanding in one direction in order to remove any rough patches or splinters. Then, switch directions and use light, even pressure as you go in order to create a uniform finish.
For finer details, switch to a finer grit sandpaper and lightly sand any areas that may have been missed. When finished, wipe away any dust or debris with a damp cloth before proceeding with assembly.
Adding Decorative Elements
To add a unique, personalized touch to your toy storage box, consider adding decorative elements like wooden beads or metal rivets. For a colorful look, use paint or wood stain to create interesting patterns or designs on the surface of the box.
You can also secure small pieces of fabric to the lid or sides of the box with a hot glue gun for a more textured look. Finally, mount small metal hooks to the sides or lid of the box to hang items like keys, hats, and mittens—or even toys!
Adding wheels or handles
To make your toy storage box more transportable, you may want to consider adding wheels or a handle. Wheels can be added to the bottom of the box using small furniture casters—simply drill a hole in each corner and secure the caster with screws.
Alternatively, you can opt for a handle if you'd prefer. Small metal handles can be attached to the sides or lid of the box using screws for a secure fit. And, for an extra special touch, use hot glue to adhere decorative wooden knobs to each side of the handle.
And there you have it—a stylish, functional toy storage box that your little one can use to store their favorite playthings. Now they'll be able to keep all of their toys in one place and easily transport them wherever they go!
By following this simple step-by-step guide, you can build a beautiful DIY toy storage box that is sure to bring a smile to any child's face. It's an easy project with plenty of potential for customization—so get creative and show off your handiwork!
Conclusion
Building your own toy storage box is a great way to add an element of fun and creativity to any playroom or bedroom. Not only will it help keep toys organized, but the process of making it can be enjoyable for both adults and children alike! With this step-by-step guide, you should have all the tools necessary to create a beautiful DIY toy storage box that looks professional yet unique. Whether you choose to customize with decorative elements like wheels or handles, wood stain or paint—the possibilities are endless! So get creative and start building today!
It's time to give your little one a place to store all their beloved playthings with this easy-to-follow guide. Now, let's get started!
Suggestions For Using The Toy Storage Box
One great way to use the toy storage box is to designate it as a specific place for all of your child's toys. This will not only give them a sense of ownership and responsibility, but it will also encourage them to keep their toys organized and neat.
Another great way to use the toy storage box is as an art supply holder. Use the lid to hang small art supplies like markers or colored pencils while storing paper, construction paper, and other crafting materials in the main compartment.
For older children, you can even use the toy storage box as a convenient place to store school supplies like notebooks, backpacks, and folders. Finally, if you'd like to add an extra special touch, consider adding small nameplates or labels with each child's name—so that everyone knows which box belongs to whom!
