DIY Noisemaker: How To Make A Fun And Festive Instrument With Hardell

Are you looking for a creative and fun way to make some noise? Then why not try making your own noisemaker? With the right tools and materials, you can craft an instrument that will bring smiles to everyone's face. In this article, we'll show you how to make a festive noisemaker with a cordless rotary tool like the Hardell.
When it comes to choosing the right tool for the job, you want to make sure that you select one of the best cordless rotary tools.
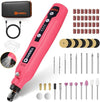
The Hardell is a great option since it is lightweight and comes with plenty of accessories. It also has a powerful motor so you can get your project done quickly and easily.
We’ll cover everything from picking out the best rotary tool for your project, what supplies you need, and step-by-step instructions on how to assemble it all together. So grab your mini rotary tool or best cordless rotary tool and let's get started!
Materials
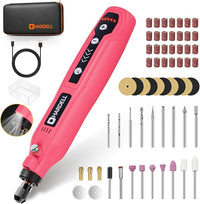
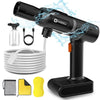
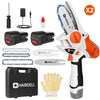
- HDRT2230 4V Mini Cordless Rotary Tool
- Scrap wood or pre-cut wooden shapes
- Paint or markers for decorating
- Bells or other noise-making objects
- Glue
Cutting And Decorating
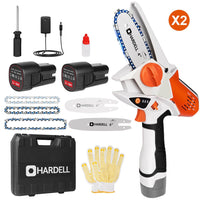
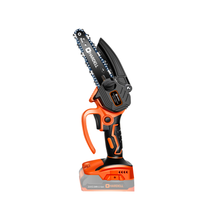
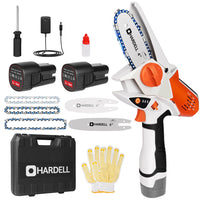
One of the most important steps in creating your own noisemaker is cutting the wooden pieces to size and shape. Using the Hardell HDRT2230 4V Mini Cordless Rotary Tool, you can easily cut, grind, and polish a variety of materials.
Here are some steps to help get you started on cutting your own wooden pieces with this rotary tool:
Gather your supplies
Make sure you have your wood, cordless rotary tool, and any other tools or materials that may be needed for decorative purposes.
Measure and mark
Determine the desired length and width of each piece before marking them with a pencil or pen.
Select the right bit
You'll need a high-speed cutting bit for wood, such as an end mill or spade bit, depending on your design needs.
Secure the wood in place
Use clamps or a vice to securely hold the wood while cutting it down to size and shape.
Cut slowly and carefully
Slowly work your way around each piece using steady pressure as you cut with your cordless rotary tool following the guidelines you marked earlier on each piece of wood.
Once all of your pieces are cut to size, it's time to move on to decorating them!
Techniques for decorating with paint or markers
Now it's time to bring your noisemaker to life by decorating each piece of wood. There are several techniques you can use to customize your design, from simple geometric shapes and lines to more intricate designs and patterns.
Freehand drawing
Using a marker or paintbrush, simply draw directly onto the wood in whatever pattern or design you choose. This technique is perfect for creating abstract designs or basic shapes for a unique and creative look.
Carving
Using your cordless rotary tool, you can carve designs into the wood with various bits and attachments. Use caution when doing this as it's easy to make mistakes if you're not careful!
Assembling your noisemaker
Now that all of your pieces are cut and decorated, it’s time to put them together. Begin by gluing each piece together in whatever order you choose, making sure that the pieces are secure.
Stencils
Create an even more detailed design by using stencils as a template for your painting or drawing. Carefully cut out the shape you want on the paper before pressing it onto the wood and tracing around it with markers or paint.
Masking tape
For those looking to create clean, symmetrical lines and shapes, masking tape is a great way to do that. After attaching the tape to the wood based on your desired design, simply fill in each section with paint or markers once the tape has been removed.
Stamping
If you’re looking for something more intricate than freehand drawing, try using rubber stamps as templates instead of paper stencils. Dip the stamp into the paint before pressing it down firmly onto the wood piece and lifting up slowly afterward so as not to smudge any of the details.
Stippling
To add texture and dimension to your noisemaker, try stippling! This technique involves dipping a brush into paint or ink before lightly tapping it against a wooden surface repeatedly until you get your desired look and texture across all of your pieces.
No matter which technique you choose, make sure to give yourself plenty of time and patience as you work through decorating each piece with paint or markers before assembling them together into one fun instrument!
Adding Noise-Making Elements
The last step in creating your own noisemaker is adding all the noise-making elements. Depending on the design you chose, this may involve pieces of string, beads, bells, and other small items that will create sound when shaken or moved around.
There are a few things to keep in mind when gathering material for your noisemaker:
Choose lightweight objects
Different materials have different weights and sizes, so make sure to pick lighter-weight items like beads, small bells, and strings that won’t weigh down your instrument too much.
Think about sound
Keep in mind that some objects make different sounds than others; for example, metal bells will create a louder jingle than smaller wooden beads. Consider how each item will contribute to the overall sound of your finished product before including it in your design.
Aim for safety
Make sure all of the pieces you use are safe and appropriate for both children and adults alike before stringing them together to complete your instrument!
Assembling these elements together is super easy with the Hardell HDRT2230 4V Mini Cordless Rotary Tool!
Just attach each piece to the wood following your design plan with screws or nails before shaking it away!
Placement And Attachment of Bells or Other Noise-makers
Once you have your noise-making elements ready to go, it's time to place them on the wooden pieces and attach them securely. The Hardell HDRT2230 4V Mini Cordless Rotary Tool is an excellent tool for attaching bells or other noise makers in your noisemaker design. With its small size and easy operation, you can precisely secure each element with a few simple steps:
Select the right drill bit
If you’re using nails to attach the bells, make sure that the nail size is appropriate for your noise maker; typically, #6 or #8 drywall nails are ideal for this purpose.
Drill holes
Set up your drill with the correct bit and begin drilling holes at even intervals along the edge of your wooden pieces where you want each bell or noise maker to be placed. Make sure not to drill too close to the edges of your wood so that everything fits securely.
Insert nails
After drilling all of your holes, insert each nail through the hole and then gently tap on it with a hammer until it is flush against the wood surface.
Attach noise makers
Once all of your nails are in place, attach each bell or other noise maker by looping strings through their respective holes before tying off on each nail head, creating a secure connection between the noisemaker and its wooden base piece.
Alternative noise-making ideas
If bells, beads, and strings aren't your thing, there are plenty of other ways to make noise with your noisemaker! Here are a few alternative options that you can use to get creative with your designs.
Recycled materials
If you're looking for something unique and eco-friendly, try incorporating recycled materials like paper cups or plastic containers into your design.
By cutting, engraving, and polishing up these items and attaching them securely to the wooden pieces with the Hardell HDRT2230 4V Mini Cordless Rotary Tool, you can create all kinds of interesting sounds and textures when they are shaken or moved around!
Natural materials
If you're looking for a more rustic sound, consider using natural elements like dried leaves or twigs. These items can be attached to the noisemaker's wooden pieces with nails or screws before being strung together for an earthy feel.
Unconventional objects
Get creative with everyday objects around the house such as bottle caps, pencils, buttons, or coins! Depending on their size and shape, each of these items can produce a distinct sound when placed onto the noisemaker's wooden surface and tapped lightly against it; experiment with different combinations until you find what works best for your design!
Conclusion
Making a noisemaker can be fun and easy with the right tools. With Hardell’s HDRT2230 4V Mini Cordless Rotary Tool, you can easily cut, grind, and polish a variety of materials in just a few simple steps.
If you're looking for something unique, consider using recycled materials like paper cups or plastic containers; if you want an earthy sound, try incorporating natural items such as dried leaves and twigs; or get creative with everyday objects around the house!
Whatever combination of sounds best fits your design, these principles will help make sure it's secure and safe to use by both children and adults alike.
Creating a noisemaker of your own is easy and fun, so get started today! With Hardell’s cordless rotary tool, you can make a festive and festive instrument with ease.
