DIY Guide To Personalized Baby Cot For Your Little One

Having a baby is an exciting time for any family, and parents are always looking for ways to make the nursery special. One great way to do this is by creating a personalized baby cot.
With some basic tools like a rotary tool, you can easily customize your little one’s crib with unique designs or patterns that will reflect your own style or even match existing furniture in the room.
There are a variety of rotary tools available, from cordless models to mini options. Depending on the project you have in mind, you’ll want to select the best rotary tool for your needs. Cordless rotary tools offer a lot of convenience and portability, while mini rotary tools may be better suited for smaller projects like creating designs on wooden cots.
It’s important to do your research and determine which one is the best cordless rotary tool for you before getting started with your project. Once you have your chosen model of rotary tool ready, it’s time to start customizing!
In this guide, we'll provide step-by-step instructions on how to use the best cordless rotary tool and other supplies to create a beautiful custom baby cot that you can be proud of!
Materials And Tools
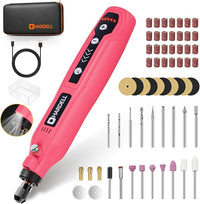
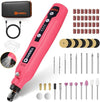
- HARDELL2240 4V Mini Cordless Rotary Tool
- Brushes
- Paper
- Pencil or pen for sketching design
- Safety goggles and gloves
- Wooden baby bed
Design And Personalization
When it comes to designing and personalizing your baby’s cot, there are plenty of options available. Here are some tips to help you get the most out of your project:
- Before you start, sketch out your design on paper to get a better idea of what you want the finished product to look like. This will allow you to plan ahead and make sure that everything fits in with the rest of the furniture in the room.
- Use a mini cordless rotary tool for precise detailing and carving into wood. A quality rotary tool will make it easier for you to create intricate patterns or shapes.
- To add color to your design, use brushes or sponges and water-based paints or stains like acrylic, chalk paint, or milk paint. Make sure that whatever type of paint or stain you use is safe for use around babies and infants.
- When it comes time to sand down any rough edges, use specific sanding bands with a range of grit sizes that can be attached to your mini cordless rotary tool for convenience and accuracy when sanding down hard-to-reach places.
- For finishing touches, alternate between topical finishes like waxes, oils, varnishes, or lacquers, depending on the desired look you would like to achieve with your personalized cot design.
- If you’re feeling adventurous, try adding decorative details such as paintings, decals, or carved wooden pieces as accents on the cot frame itself – this will add even more personality and uniqueness!
- Finally, safety should always be at the top of your list when creating a personalized baby cot – ensure that all screws and fastenings are securely tightened before using it with an infant!
By following these steps carefully and using high-quality tools such as an HDRT2240 4V Mini Cordless Rotary Tool, you can create a truly unique baby bed!
Creating custom shapes and patterns
With the HDRT2240 4V Mini Cordless Rotary Tool, you can create a variety of shapes and patterns on your baby cot. To start, you'll need to decide what type of design or pattern you'd like to create. Whether it's a floral pattern, geometric shapes, or something else entirely – it's up to you!
Then, once you have an idea for what shape or pattern you'd like to make, use your pencil or pen to sketch out the design on paper first. Once that's done, you can move on to carving with diamond bits accessories provided with the rotary tool, then using sanding bands and sanding papers to polish the edges and corners. Finally, use the rotary tools to finish polishing the pattern until it looks just how you want it.
Use of rotary tools for carving and shaping the wood
The rotary tool is essential for crafting intricate designs on wood, especially when it comes to personalizing a baby cot. With the HDRT2240 4V Mini Cordless Rotary Tool, you can precisely carve, shape and polish the wood to create beautiful patterns or shapes. It has a powerful motor, five speeds from 5,000 - 18,000 RPMs, and diamond bits accessories that allow for detailed designs' delicate and precise carving.
The rotary tool also has a sanding band attachment which is perfect for smoothing out rough edges and corners, as well as sandpaper attachments to help you achieve more specific details such as lettering or fine lines. With this tool in hand, it's easy to customize your baby's cot into the perfect piece of furniture fit for your little one!
Assembly And Finishing
Now that you've completed the carving and shaping of your cot design, it's time to sand down any rough edges.
Importance of sanding in achieving a smooth and polished finish
Proper sanding is essential for creating a smooth and polished finish on any furniture piece, especially when it comes to baby cots. You can easily achieve the desired effect without any rough edges or corners by using the right sandpaper grits and accessories on your mini cordless rotary tool.
Start by using coarse grit sandpaper first to get rid of any imperfections or bumps, then move on to finer grits such as 120-150 to give it an extra level of smoothness. Finally, use the finest grit (usually between 400-600) to give the wood a glossy, mirror-like finish.
Selection Of The Appropriate Sandpaper Grits And Accessories
The type of sandpaper grit you choose will depend on what kind of material you’re working with. For softer woods such as pine or spruce, use 60-120 grit for initial shaping and grinding down any rough spots before switching to finer paper like 150-400 for polishing. For harder woods such as oak or mahogany, start with a more aggressive 80-100 grit sandpaper followed by 200-220 grit as a final step for polishing.
Once you’ve chosen the appropriate grit, you can use the rotary tool and its various attachments to get a more precise finish. For instance, for curved or detailed surfaces such as letters or symbols, use small rubber-bonded sanding drums designed for intricate carving and shaping.
You can also use a flexible polishing disc attachment with compound polish paste to give your cot an ultra-smooth finish. With these attachments and techniques in hand, it's easy to create beautiful personalized designs on your baby cot!
Sanding bit accessories may be used for straight line and curve cutting, depending on the design of the baby cot. These bit accessories are also perfect for sanding down small areas like corners and edges.
Application Of A Finish To Protect And Enhance The Wood
The final step in creating a personalized baby cot with a mini cordless rotary tool is to apply a finish to protect and enhance the wood. The type of finish you choose will depend on the type of wood used and how it will be used. For example, if your design involves intricate carvings and delicate details, you may want to use a polyurethane sealer or varnish to protect them from wear and tear.
On the other hand, if you’re looking for a more natural look, there are special oil-based finishes that will bring out the beauty of the grain while still providing protection against dirt and moisture.
It’s also important to consider how often your little one will be using their cot; if it's going to be frequently used, then you'll want to opt for an extra durable coating like urethane or lacquer for maximum protection against everyday wear and tear.
With the right mini cordless rotary tool, sandpaper, and a few finishing touches, you can easily customize your baby’s cot into the perfect piece of furniture for their little one!
Whether you choose to go all-out with intricate carvings or simply want to add a simple design, this DIY guide is sure to provide you with all the tips and information you need. So get creative and make something unique that your little one will cherish forever!
Conclusion
Creating a personalized baby cot is an amazing way to add something special and unique to your nursery. With the right tools, such as a cordless rotary tool, you can easily carve beautiful shapes or patterns into any type of wood with precision and ease.
Moreover, by applying the appropriate sandpaper grits and finishes, you will be able to achieve a smooth finish that looks like it was done professionally!
Not only do these customized pieces make great heirlooms for future generations, but they also serve as timeless keepsakes that remind us of our little ones’ earliest days in life.
