DIY Guide: How To Make A Stylish Business Card Holder

Tired of carrying around your business cards in a bulky wallet or purse? Why not make your own stylish business card holder to keep them organized and easy to find? With just a few simple materials, you can create an attractive and practical way to store your cards that will make sure you always have one handy when someone asks for it.
Read on for the step-by-step guide on how to make this unique DIY project.
Materials and Tools
-
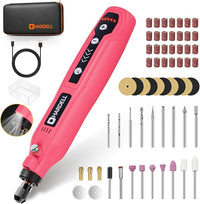
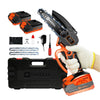
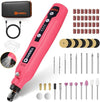
HDRT2210 4V Mini Cordless Rotary Tool
- Sanding band
- Sandpaper
- Drill bits
- Saw
- Miter box or miter saw
- Ruler or measuring tape
- Pencil or pen
- Clamps
- Wood glue or metal adhesive
- Screwdriver
- Screws
- Finishing nail gun
- Wooden board or sheet metal
- Stain or paint
- Varnish or sealant
Design
When designing your own business card holder, there are a few important things to consider that will help you find the perfect design for your needs and style. Here are some tips to keep in mind when deciding on a design:
Think about how many cards you want to store
Some holders can hold just a few cards, while others may be able to fit dozens. Consider what size of holder is best for your needs, as this will affect the materials and measurements you need for the project.
Consider the type of material you want to use
Wooden board or sheet metal? Each has its own unique look and feel, so choose one that best reflects your style. Wood is more visually appealing but requires more work with saws, clamps, and sanding bands; whereas sheet metal is easier to shape with tools like a mini cordless rotary tool and drill bits.
Think about any details or embellishments you'd like
Custom engravings or artwork can add an extra touch of personality to your business card holder. If making it yourself isn’t an option, there are plenty of online stores that offer custom designs so you can find just what you're looking for!
Decide on finishings
Stain or paint colors that match your overall design aesthetic, as well as varnish or sealant to protect against wear and tear. This will help ensure that your business cardholder looks great for years to come!
Inspiration for creative and unique designs
When looking for inspiration, there are plenty of creative and unique designs available online – or, if you’re feeling adventurous, why not come up with something completely original? Here are some ideas to help get those creative juices flowing:
- For a classic look, use wood as the base material and choose an elegant stain color for the finishing touches. Considerrotary tool engraving it with your company logo or initials for added personalization.
- For something more modern, opt for sheet metal instead of wood – drill holes into the metal in various shapes, such as circles or hexagons, and thread through thin cords in contrasting colors for added texture.
- If you’d like to add bright pops of color, consider painting with metallic paints or using brightly colored cords. For an even bolder look, opt for patterned fabric strips cut into varying lengths and glued onto the edges of the holder.
- For a truly eye-catching design, consider using multiple materials such as wood combined with metals such as brass or copper. The contrast between materials can give any design an extra edge!
Preparation
Before you start the project, it is important to prepare the materials correctly to ensure a successful outcome. Here are some steps for preparing the materials:
- Measure the components – using either a ruler or measuring tape, measure out the lengths and widths of the pieces needed for your business card holder and mark them out on the board or sheet metal with a pencil or pen.
- Cut out pieces – use saws or a miter box/miter saw to cut out each piece of wood or metal according to your measurements from before. For an extra accurate cut, make sure that clamps are used to hold the material in place while you work.
- Sand edges – use sandpaper or a sanding band to smooth down any rough edges on each piece of material. This will help create more attractive and professional-looking results when putting together your business card holder.
- Drill holes – depending on your design, you may need to drill holes in order to join different pieces together, as well as for any other embellishments, such as cords. Use either a drill bit or a mini cordless rotary tool for this task.
- Adhere pieces – once all of your pieces are cut and drilled, apply glue or an adhesive onto their surfaces before joining them together using nails or screws; this will help keep everything firmly in place while you work.
Assembly
There are some Step-by-step instructions for assembling the holder. These are as follows:
- Once all the pieces have been prepared, it’s time to begin assembling the business card holder. Start by laying out all of the components in the order they will be used, then grab a screwdriver or drill to begin fastening the pieces together.
- Begin by fastening two sides of the holder together, making sure that they are securely attached and at right angles to each other. Once you are satisfied with their alignment, use screws and nails to secure them.
- Next, measure and cut out pieces for the base of the holder using either wood or metal as your material. Once these pieces are cut out and sanded, attach them to the sides with nails or screws.
- Attach any embellishments, such as cords or artwork onto the business card holder; this can be done by drilling holes into both sides and threading through thin cords or gluing on artwork directly onto the surface.
- Finally, finish off your business card holder with a coat of paint or stain and sealant to protect against wear and tear; this will help ensure that it looks great for years to come!
Tips and tricks for a sturdy and polished finish
Here are some Tips and Tricks for a sturdy and polished finish:
- Before you begin painting or staining the business card holder, it's important to clean the surface with a damp cloth and make sure that any dust, dirt, or grease is removed. This will ensure that your paint or stain adheres properly for a smoother and more polished finish.
- When painting the holder, use several thin coats of paint rather than one thick coat for a more even and professional-looking result. Alternatively, you could opt for spray paint for an even easier application.
- For a truly polished look, consider sanding down the surface between each coat of paint or stain; this will help create an even smoother finish and reduce brush strokes. Another great finishing touch is to add wax or sealant over the top of your painted or stained business card holder; this will help protect it from wear and tear and keep it looking brand new!
- If you're using fabric strips, consider gluing them onto foam board before attaching them to your business card holder; this will help keep them in place securely while allowing you to easily remove or adjust them if necessary.
- When drilling holes into wood or metal for cords, be sure to use the correct type of drill bit for each material in order to avoid any damage. Additionally, it's important to measure out where exactly you need to drill beforehand so that all pieces fit together correctly once assembled.
Customization
Customization is key to making your business card holder stand out from the competition. With a few simple DIY techniques, you can easily create a unique and personalized holder to represent your brand. Here are some tips for customizing your business card holder:
Engraving
Add a personal touch to your holder by engraving an image, quote, or logo onto its surface; this creates a timeless and professional effect. For best results, consider using a rotary tool for precise engravings as well as for cutting out shapes or patterns on the holder’s surface.
Embellishments
Customize your holder further by adding embellishments such as cords, beads, or decorative buttons; these will help make it stand out from other business cards and give it an even more unique appearance. Additionally, you could glue fabric strips onto the surface of the holder for a soft texture and interesting pattern or design.
Stenciling
Use stencils to create patterns on the surface of the business card holder as another way to customize it. Choose from simple shapes such as hearts or stars to larger stencils featuring intricate designs; this is also an easy way to add logos or other text onto the surfaces of holders made from wood or metal.
Painting
Add a splash of color to your cardholder with paint. Choose from basic colors or mix and match to create an even more vibrant look. Consider using spray paint for an even easier application and to achieve a more polished finish.
