Create A Beautifully Carved Wooden Spoon: A Step-By-Step Guide

Are you looking for a fun and creative new hobby? Carving wooden spoons is an enjoyable activity that can help bring out your inner artist. Not only is it relaxing to make something with your own hands, but the end result can be beautiful works of art.
Plus, having a handmade wooden spoon in your kitchen adds an extra touch of style! In this guide, we'll show you how to create a beautifully carved wooden spoon from start to finish. So, grab some wood, and let's get started!
Materials Needed
To carve a wooden spoon, you'll need some basic tools and materials.
- Wood Blank
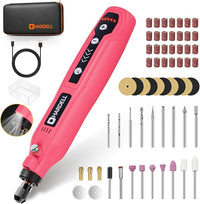
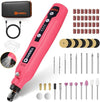
- Hardell Rotary Tool
- Sanding Attachments/Grinding Wheel
- Diamond Bits
- Carving Burrs
- Pencil
- Ruler Or Measuring Tape
- Finishing Oil
Preparation Work
Preparation Work is the key to a successful carving project. Before you begin, it’s important to select the right piece of wood for your spoon. Harder woods, such as maple and oak, are preferable for carving spoons because they are more durable and easier to work with. Cut the blank down to size with a saw if needed, then use sandpaper to smooth out any rough edges.
Next, measure and mark off where you want your design elements on the spoon—this will be your guide for carving. If you’re unsure about how to start, simply draw some basic lines or circles on the wood that you can follow when carving.
To ensure accuracy while shaping the spoon, use a rotary tool with different attachments or grinding wheels. For detailed work, such as adding texture or finer details like lettering, use diamond bits or burrs. You may also need to adjust your tool settings depending on the type of wood used and your desired finish.
Step-By-Step Guide
Before you start carving, it is important to have all the necessary tools and materials ready. You will need a Hardell rotary tool with a variety of attachments, diamond bits, carving burrs, a pencil, a ruler or measuring tape, and finishing oil.
Pick Your Wood Wisely
When choosing a wood blank for carving a spoon, it is important to carefully consider the type of wood you are working with. Different types of wood have different characteristics that make them more or less suitable for carving. Hardwoods such as maple, walnut, and cherry are the best choices for spoon carving due to their strength and durability.
These hardwoods are less likely to splinter or chip when carving, and they tend to hold their shape better.
Split And Prepare the Wood for Carving
Once you have selected the wood for your spoon, it is time to start preparing it for carving. To do this, you will need a saw or other cutting tool, such as a table saw, band saw, jigsaw, or hand saw.
Start by making a straight cut along one edge of the wood blank to create a flat surface that can be used as a reference point for carving. You may also need to split the wood in half, depending on the size and shape of your spoon.
Remove The Core
Once the wood has been cut to size and split in half, it is time to remove the core. This can be done by carefully cutting away any excess wood that is not required for the spoon shape. The best way to go about this is to use a rotary tool with a sanding attachment or grinding wheel. Be sure to wear protective eye gear when using power tools and always work in a well-ventilated area.
When removing the core, it is important to round off any sharp edges on the spoon’s handle and bowl. This will ensure a smooth finish and prevent splinters later on. It may also be necessary to carve away some of the interiors of the bowl to create a more comfortable grip while eating.
Once you are satisfied with the overall shape of your spoon, you can begin adding details such as texture or lettering if desired.
Clean The Wood
Before you begin your project, it is important to thoroughly clean the blank wood. This step removes any dirt or debris that may be on the surface of the wood and creates a smooth surface for carving. Using a damp cloth or brush and mild soap, simply wipe down the entire surface of the wood until it is clean and free of dust or residue.
Once this has been done, use sandpaper to gently smooth out any rough edges or imperfections in the wood. This will help to create a more even and uniform finish that will make your carving look its best. Use progressively finer grits of sandpaper (such as 150-grit, 220-grit, and 400-grit) to achieve a professional finish. Once you have finished sanding, wipe away any remaining dust before proceeding with your project.
Finish The Rounding
Once you have finished sanding and removed the core, use a rotary tool with different attachments or grinding wheels to round off any sharp edges on the spoon’s handle and bowl. This will help to create a smooth finish that prevents splinters later on. Adjust your tool settings depending on the type of wood used and your desired finish.
For finer details like lettering, use diamond bits or burrs for detailed work. Once you are satisfied with the overall shape of your spoon, you can begin adding texture or lettering if desired. Finally, apply finishing oil to protect the wood from moisture, dirt, and wear and tear over time.
Trace The Spoon Template
Once the wood is prepared, it is time to trace your spoon template onto the blank. This will provide a guide to help you carve out the desired shape. Depending on the type of template you are using, you may need to use a pencil or a tracing wheel.
If using a paper template, it is important to secure the paper firmly in place to prevent it from moving while tracing.
Sand And Smooth the Surface with Hardell Rotary Tool
Once the spoon template has been traced, it is time to start sanding and smoothing the surface of the wood with a Hardell rotary tool. Start with coarse sandpaper and slowly move up to finer grits as you go.
This will help to remove any bumps or uneven surfaces from the wood, as well as sharp edges.
Finish With Oil and Buffing
Once you are satisfied with the shape of your spoon, it is time to finish it off with a coat or two of finishing oil. This will help protect the wood from moisture, as well as bring out its natural color. After applying the oil, let it dry before buffing the spoon to a glossy shine.
Safety Tips
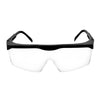
- Always wear protective eyewear when using power tools, such as a rotary tool with an attached grinding wheel. Additionally, make sure to work in a well-ventilated area.
- When sanding the wood, start with coarse-grit sandpaper and then move up to finer grits as you go. This will help create an even, uniform finish and prevent splinters later on.
- Secure any paper templates firmly in place before tracing them onto the wood blank to ensure accuracy and precision when carving out the desired shape of your spoon.
- Never apply too much pressure when carving or sanding the wood, as this can damage or warp the material or even cause personal injury.
- Take breaks often when working with power tools, so your hands do not become fatigued and lose control of the tool.
- Make sure that all cutting edges are dulled down before attempting to carve out details, such as lettering, to avoid any accidents while using sharp objects near your body or face.
- Place a cloth underneath your workpiece when sanding or carving to protect any nearby surfaces from dust or debris that may be produced from the process.
- Always keep all power tools unplugged when changing bits or attachments on them for maximum safety measures against electric shock and fire hazards.
- Use finishing oil after scraping away excess material from carved wooden spoons; this will help protect against moisture, dirt, and wear and tear caused by everyday use over time.
- Clean up your workspace once you have finished working; this includes disposing of any sawdust created from sanding/carving as well as putting away all tools used during the project in their proper storage location.
Conclusion
Carving a wooden spoon is an enjoyable and rewarding experience. With the right tools, patience, and safety precautions in place, you can create beautiful pieces of art that will last for years to come.
The steps outlined above provide a detailed overview of how to turn a piece of wood into something special – from sanding down the edges to adding finishing oil for protection.
Whether this is your first-time carving or you’re looking to refine your existing skill set, these tips should help make the process easier. So take some time out of your day and get creative with crafting wooden spoons!
