Create a Beautiful and Practical DIY Wooden Pen Holder

If you’re looking for a fun, creative project to try in your spare time, why not make your own beautiful and practical DIY wooden pen holder? This project is simple enough for even novice woodworkers and can be completed quickly with the help of a Hardell rotary tool. Not only will you get to create something unique and useful, but it’s also a great way to practice honing your craftsmanship.
With just some basic tools and materials, you’ll have an attractive piece that adds charm to any desk or workspace. So, let's get started!
Materials and Tools
For this project, you’ll need the following materials:
- The wood of your choice (we used pine in our example
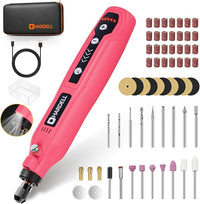
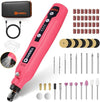
- Hardell 3110 160W Corded Variable-Speed Rotary Tool
- Drill bits
- Sandpaper
- Finishing varnish or paint
- Wood glue
- Saw for cutting wood to size (we used a jigsaw)
- Drill press or hand drill with drill bits for pilot holes & screw connections.
- Clamps for holding pieces secure while sawing and drilling
Once you have all of your materials and tools ready, it’s time to start building!
Step-by-Step Guide
Before you begin, make sure to have all of your materials and tools on hand and ready to go. You’ll want to plan out the design of your pen holder before you start building.
Cutting The Wood to Size
When cutting wood, it is important to be precise. You can use a scale and measuring tape to accurately measure the wood and cut it to the desired dimensions. A Hardell rotary tool and diamond bits are ideal for making clean cuts in the wood, as they provide more control over the cutting process.
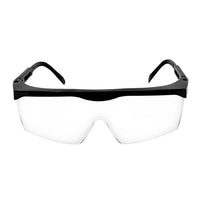
For best results, use a slow-speed setting on your rotary tool when cutting with diamond bits, and make sure that you wear protective eyewear. This will help ensure that your DIY pen holder looks great when finished.
Drill Pilot Holes
Using a drill press or hand drill with drill bits, create pilot holes in each piece of wood where they will be connected. This will help to make sure that the screw connections are secure and won’t slip out over time. If you don’t have access to a drill press, you can use a Hardell rotary tool to create small pilot holes as well.
Sanding The Wood
Once you have finished cutting your pieces of wood to the desired size, it's time to start sanding them for a smooth finish. This can be done using the appropriate attachments for your Hardell rotary tool and adjusting the speed setting to medium or low. Sandpaper with a higher grit will give you a smoother finish than paper with a lower grit.
It is important to use even strokes when sanding and make sure that all surfaces are evenly treated. Additionally, be sure to wear safety goggles, as flying particles can cause irritation or even injury when sanding at higher speeds.
When you are finished sanding, use a clean cloth to wipe off any dust left over from the process. You can now proceed to assemble your DIY wooden pen holder!
Applying A Finish to The Wood
Once you have sanded your wooden pen holder, it is time to apply a finish. The type of finish you use will depend on the look you are trying to achieve. A clear varnish or polyurethane can be used for a glossy, protective finish, while a wood oil can be used for a more natural look.
To apply the finish, you will need to use a brush or rag and make sure that all surfaces are evenly treated. Wait at least one hour for the finish to dry before proceeding with assembly.
Piecing And Stacking with Wood Glue
Once you have applied the finish to your wooden pen holder, it is time to piece it together. Start by laying out the pieces of wood in their desired configuration. Apply a generous amount of wood glue to each of the pieces before stacking them on top of each other. This will ensure that all pieces are securely attached.
You can use clamps or weights to hold the pieces together while the glue dries. Wait for at least an hour before proceeding with assembly.
Drilling And Mounting with Screws
Once the wood glue has dried, you can drill holes into the wood and secure the pieces together with screws. Make sure to use quality wood screws that are designed for woodworking projects, as they will provide a stronger hold and last longer. Drill your holes slightly larger than the diameter of the screw to ensure a snug fit.
When drilling, it is important to use the appropriate drill bit for your project. For best results, use a low-speed setting and wear protective eyewear to avoid any potential injuries.
Engraved Your Name with The Hardell Rotary Tool
Using the Hardell rotary tool and diamond bit attachment, you can carefully engrave your name or any other text into the wood. This will add a unique, personalized touch to your DIY pen holder. The process is not difficult and can be done in a few minutes.
Start by selecting the desired font and size of the text to be engraved. Adjust the speed on your rotary tool to low or medium, and use even, steady strokes when engraving. Wearing safety goggles is highly recommended in order to avoid any potential injuries.
When you have finished engraving, you can now enjoy your beautiful and practical DIY wooden pen holder!
Conclusion
Creating a beautiful and practical DIY wooden pen holder is not as difficult as it may seem. With the right tools, materials, and techniques, you can create your own unique design that will be sure to impress! We hope this article has been helpful in guiding you through the process of making your own custom-made wooden pen holder.
Tips for Success
The key to success when crafting a DIY wooden pen holder is to use the right tools and techniques. For example, it's important to use a sanding block or disk as opposed to just sandpaper to get the most effective results. When selecting the type of wood for your project, make sure you choose one that is sturdy and can withstand the wear and tear of everyday use.
Finally, ensure you apply a protective finish to your project in order to protect it from dirt, dust, and other debris. Following these tips will help ensure that you have a successful outcome with your DIY wooden pen holder.
More creative DIY office supplies
Creating your own office supplies with a Hardell rotary tool is a fun and rewarding way to enhance your workspace. With a little bit of creativity and some basic woodworking skills, you can create unique and personalized items that will help you stay organized and productive at work. Here are some ideas for DIY office supplies you can create with your Hardell rotary tool.
Desk Organizer
One of the easiest DIY office supplies you can create with your Hardell rotary tool is a desk organizer. You can use a piece of wood and carve out different compartments for holding pens, pencils, paper clips, and other office supplies. With a little bit of sanding and polishing, you can make the organizer look sleek and professional.
Business Card Holder
A business card holder is another practical office supply that you can create with your Hardell rotary tool. You can use a block of wood or metal and carve out a space for holding your business cards. You can also engrave your name or company logo onto the holder for a personalized touch.
Phone Stand
A phone stand is a great way to keep your phone at eye level while you work. You can create a simple stand using a block of wood and carving out a groove for your phone to rest in. With a little bit of sanding and polishing, you can create a beautiful and functional phone stand that will add some personality to your workspace.
Desk Name Plate
A desk name plate is a great way to personalize your workspace and make it feel more professional. You can create a name plate using a piece of wood or metal and engraving your name and job title onto it. You can also add any other design elements that you think will make it stand out.
Bookends
Bookends are a great way to keep your books organized and looking neat on your desk. You can create bookends using a variety of materials, including wood, metal, and acrylic. You can also engrave designs or quotes onto the bookends to give them a personal touch.
Whether you are looking for something special to give as a gift or just want to add a personal touch to your workspace, creating your own piece of woodworking art is both rewarding and fun! So grab some supplies, get creative, and make something amazing today!
