Top Tips For Avoiding Wood Carving Failures

Creating beautiful wood carvings is a rewarding and satisfying experience, but it can also be challenging. There are many potential pitfalls that can cause your projects to fail, from selecting the wrong tools to improper techniques.
To ensure success in your wood carving endeavors, here are some tips for avoiding common mistakes and ensuring a successful finished product every time.
By following these simple guidelines you'll have all the necessary knowledge and tools at hand to make sure your project turns out exactly as intended. With the right preparation and selection of materials, plus an understanding of the best techniques for using rotary tools like cordless rotary tools or mini rotary tools, you’ll be able to create stunning works of art with ease!
Proper Tool Selection
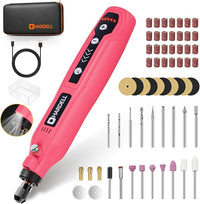
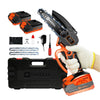
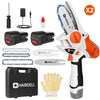
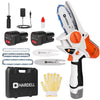
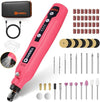
When it comes to wood carving, selecting the right tool is the first step toward success. Hardell tools such as cordless rotary tools, mini rotary tools are great for a variety of tasks, from cutting and trimming to polishing and sanding.
When deciding on which type of tool is best suited for your project, consider the size and complexity of the job at hand in order to select the most appropriate option.
Choosing the Right Hardell Tool for Your Project
Cordless rotary tools offer maximum convenience during prolonged projects since they don’t need to be plugged in. Additionally, cordless rotary tools are often more powerful than their corded counterparts and therefore provide faster results with less effort.
Mini rotary tools are compact versions of standard models that feature a smaller motor but still have enough power for basic woodworking tasks such as rough carving or sanding.
But if you’re looking for performance that offers both power and precision then Hardell’s standard rotary tool is an ideal choice as they come equipped with different speed settings so you can switch between light-duty and heavy-duty tasks quickly and easily.

Understanding the Different Bits and Attachments Available
Using the right bit or attachment on your Hardell tool is key when it comes to achieving precise results with minimal effort. For example, when it comes to engraving details into wood it’s best practice to use a small carbide-tipped bit which offers greater accuracy than using a larger router bit.
Similarly, utilizing sanding accessories like drum sander kits will help you achieve smooth finishes without any bumps or grooves in your finished product. Whatever task you are taking on there is likely an appropriate bit or attachment available for your specific needs so be sure to do some research ahead of time in order to get the most out of your projects!
Preparation And Planning
Before starting any wood carving project it’s important to take the necessary steps to ensure success. This includes properly securing your workpiece, creating a detailed sketch or plan for your design, and selecting the right Hardell tool and accessories for the job.
Properly Securing Your Work Piece
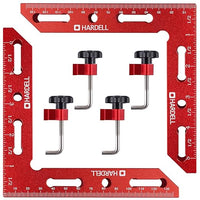
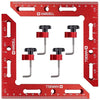
Securing your workpiece is essential when it comes to wood carving since a loose material will cause your results to be inconsistent and potentially dangerous. To achieve a stable platform, use either clamps or a vise to firmly attach your wood to a flat surface such as a workbench or table.
This will make sure that it stays in place while you work and also reduce vibrations which can lead to inaccuracies in your cuts or carvings.
Having an accurate plan of what you want your final product to look like is crucial when engaging in any type of woodworking project.
A detailed sketch or plan should include measurements, angles, depths, and other specifics so that you have exact instructions on how each step should be completed. Additionally, having this visual guideline will give you better guidance during the carving process so that you don’t have any surprises along the way!

Techniques For Successful Carving
When it comes to wood carving, it’s important to know and follow certain techniques in order to achieve the best results. Here are some tips for successful carving with a Hardell rotary tool:
Start with Shallow Cuts and Gradually Increase the Depth
When starting any detail work on a piece of wood, start by making shallow cuts first and then gradually increasing the depth of each cut. This will help you get familiar with the material as well as prevent mistakes or inconsistencies due to excess pressure or aggressive cutting.
Avoid Applying Too Much Pressure
Pressure plays an important role when it comes to carving tools so it’s important not to apply too much pressure while using your Hardell rotary tool. Excessive pressure can cause your tool bit to slip, resulting in inconsistent lines or grooves in the wood that can be difficult to remove later on.
Instead, use slow and steady movements while keeping a consistent speed throughout each cut.
Use Appropriate Accessories
In order to make sure you get an even finish when sanding or polishing wood, select the right accessories for your task such as drum sander kits, buffing pads, and various cutting bits.
Utilizing these attachments will ensure that you don’t create any unnecessary grooves or leave behind rough edges which can ruin your finished product.
Taking Breaks to Avoid Fatigue and Mistakes
It is important to take breaks when wood carving to ensure that you don’t fatigue and make mistakes. Taking a few minutes break every 15-20 minutes can help you stay focused, and alert, and maintain an even cutting speed. Additionally, it will give your hands and wrists the rest they need in order to avoid overuse injuries such as carpal tunnel syndrome.
Moreover, taking breaks enables you to take a step back and assess your progress. This will help prevent any errors due to rushing and allow you to double-check that everything is going according to plan and that all of your lines are accurate.
Finishing And Sanding
Once your wood carving is complete, it’s essential to take the time to properly finish and sand your piece in order to achieve the look and feel you desire. Here are some tips for properly finishing your wood carvings:
Use a Fine Grit Sandpaper
Start by using fine-grit sandpaper such as 220 or 320-grit to remove any imperfections on the surface of your carving. This will smooth out rough edges, small ridges, or other irregularities that may be present.
Additionally, this will help bring out finer details in your carving so that they are more visible.
Apply Finishing Oil
Finishing oil is ideal for bringing out natural colors and enhancing the grain of the wood in your carving. It also helps to seal any engraving marks or other minute details so that they won’t fade over time.
Use a soft cloth with a few drops of oil to apply evenly across the entire surface of the wood piece. Let sit for several minutes before wiping off any excess with a clean rag.
Polish with Paste Wax
Paste wax is great for adding a protective layer over your finished piece while also making it easier to clean off dirt or dust later on. Start by applying a thin coat of paste wax over the entire wood piece using circular motions to buff it into place before letting it dry completely.
Once dry, lightly go over it again with a soft cloth until you get the desired shine or sheen you are looking for!
Troubleshooting Common Issues
When it comes to wood carving, mistakes are inevitable and can often be difficult to fix once they occur. But don’t worry—with the right strategies and tools, you can salvage even the most challenging pieces that have gone wrong. Here are some tips for fixing mistakes or errors in carving:
Use a Rotary Tool
Using a Hardell rotary tool for wood carving can be an incredibly rewarding experience. It can create intricate and beautiful designs in wood, allowing you to express your creativity through the medium of woodworking.
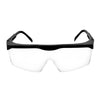
When using your hardell rotary tool, always take safety precautions and wear protective gear such as gloves and safety glasses.
Additionally, be sure to secure your piece of wood onto a steady surface before beginning any cutting or carving so that it doesn't move around during operation. This will help prevent any accidents or missteps while creating intricate patterns in the wood.
Fill in Gaps with Wood Filler
Wood filler can be used to fill any gaps or small holes left behind from carving. Start by using a putty knife to apply the wood filler in thin layers until the desired shape is achieved.
Once dry, use fine-grit sandpaper or a wire brush to smooth out the surface before painting with your preferred color.
Sanding and Refinishing
Sanding is an important part of any woodworking project and is especially useful when trying to fix mistakes made during carving. Start by using coarse-grit sandpaper (e.g., 80-120) to remove any imperfections on the surface of your piece before using finer grits (e.g., 220-320) for further detailing work and smoothing out rough patches.
Conclusion
Wood carving is a great way to express your creativity and create unique pieces of art. With the right tools, techniques, and tips for avoiding common mistakes, you can achieve beautiful results in no time!
From using sandpaper with different grits to filling gaps with wood filler or polishing with paste wax – there are many ways to make sure that each piece is finished off properly.
