Mastering Glass Engraving: A Step-by-Step Guide

Mastering Glass Engraving: A Step-by-Step Guide
Glass engraving is a fun and rewarding craft. With the right tools, some practice, and a little bit of patience, you can create beautiful pieces that are sure to impress your friends and family. Whether you're looking to add personalized touches to glassware or want to make unique gifts for special occasions, mastering glass engraving can be an enjoyable experience.
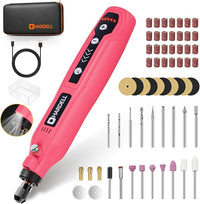
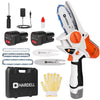
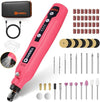
To get started with this craft, you'll need the best rotary tool for the job - one that's both powerful enough to cut through glass yet precise enough for intricate designs.
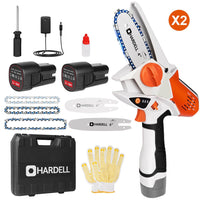
A cordless rotary tool such as a mini rotary tool or the best cordless rotary tool is ideal since it will be easier on your hands than traditional electric models in long-term use.
In this step-by-step guide, we'll discuss how to choose the right tools and provide tips on how to master glass engraving like a pro!
Preparing The Glass
Before you start engraving on a glass surface, it's important to ensure that the area you are working on is clean and free from any dust or debris. This will help you achieve a smooth and consistent finish, as any imperfections on the surface can affect your results.
To begin, lightly dampen a soft cloth with water and wipe down the entire glass surface to remove any dirt or residue. Then dry off the glass thoroughly using a second dry cloth to ensure that no moisture is left on the surface.
Applying a design or template to the glass

Once your glass is cleaned and dried, it's time to apply the design or template you want to engrave onto the glass. If you're using a pre-made stencil or pattern, carefully place it on the glass and use a pen or marker to trace around the edges. Make sure to press firmly so that all of your lines are clearly visible.
If you're creating a freehand design, begin by drawing light pencil lines onto the glass with a steady hand. You can also use adhesive tape to section off areas in order for easier accuracy when drawing intricate designs. Once you have completed your sketch, carefully erase any pencil lines that may still be visible on the surface of the glass.
Finally, secure your template or design in place with painter's tape before beginning engraving so that it won't move while you work.
Securing the glass for stability during engraving
Before you start engraving the glass, it's important to secure the piece in place for stability during the process. This will help prevent any slipping or movement of the glass which could result in inaccurate results or even injury.
To begin, use clamps to affix the glass securely onto a sturdy work surface such as a table or countertop. Make sure that the clamps are firmly secured so that they won't come loose while you're working.
You can also use painter's tape to create makeshift suction cups by affixing pieces of tape with sticky sides up onto your work area and then pressing down on them with your glass. This will help keep the glass in place without having to use clamps.
Engraving Techniques
Once you have prepared the glass and securely affixed it in place, it's time to start engraving! For this task, you'll need a rotary tool such as a best cordless rotary tool or mini rotary tool for more precise results.
Now that you have your desired tools and equipment ready to go, here are some techniques to consider when starting out with glass engraving:
Use of steady pressure
When engraving on glass, it's important to apply gentle but firm pressure in order to get the right depth and texture. Keeping the bit in contact with the surface for an extended period of time will help create deeper cuts whereas light strokes will create more shallow marks on the surface.
Using varying levels of rotation
Depending on how deep or intricate you would like your design to be, you can adjust the speed and direction of rotation as necessary using left-right, up-down, or clockwise-counterclockwise motions.
Creating curved lines
To achieve curved lines when engraving on glass, gently guide your bit around small curves before returning back to its original location on the piece. Creating continuous curves requires patience and precision as any sudden changes in pressure or speed can result in unwanted patterns or marks on your workpiece.
Tips And Tricks For Achieving Precise Lines And Shapes
When it comes to engraving precise lines and shapes on glass, having the right tools and techniques is key. Here are some tips and tricks to help you achieve accurate results when engraving glass:
Trace a design beforehand
An effective way of ensuring accuracy when engraving complex designs or shapes is to trace out the desired pattern onto the surface of the glass before beginning the actual process.
Adjust speed for different textures
Depending on whether you would like to produce light or deep grooves on the glass, adjusting your speed can help create varying levels of texture in your workpiece. For instance, using slower speeds will often result in deeper cuts whereas higher speeds can create shallow grooves on the surface.
Using sandpaper for smoothing surfaces
Once you have finished engraving your design, use sandpaper to smooth out any rough patches or uneven surfaces. Depending on how deep your cuts were, you may need to start with more coarse grit paper such as 120-150 before gradually switching over to finer grits like 320-400 for polishing purposes.
Sandblasting Techniques
Sandblasting is a popular alternative to rotary tools for engraving glass and other materials. It's a fast, efficient way to achieve precise lines, shapes, and textures that can't be achieved with traditional methods.
Sandblasting involves using an abrasive material such as sand or glass beads which are blasted onto the surface of the material being engraved at high speed, resulting in smooth grooves or patterns on its surface.
To get started with sandblasting, you will need some specialized equipment such as an air compressor, blasting gun, and most importantly – your choice of abrasive material.
Tips And Techniques For Achieving Desired Effects With Sandblasting
When sandblasting, it is important to keep the following tips and techniques in mind:
- Start by using a coarse grit material such as 80-100 for removing large amounts of material.
- Use a medium grit such as 150-220 for creating finer details and adding texture to your design.
- Keep the nozzle of the blasting gun at a constant distance from the surface to maintain even pressure and avoid creating unwanted marks.
- Sandblasting can be used to create frosted, etched, and other decorative effects on glass.
Finishing And Care

Once you have finished engraving your design, applying a finish is important to protect the glass from scratches and abrasion as well as enhance its appearance. You can use a clear epoxy or lacquer to seal the engraving, which will ensure that it lasts longer. Additionally, you may want to tint the finish with a bit of food coloring or paint to give it more color and vibrancy.
For proper care and maintenance of glass engravings, always handle them with care as they are prone to breakage if not handled properly. When washing or cleaning glass surfaces, use a mild soap and water solution along with a soft cloth or sponge in order to avoid any scratches or damage.
Innovative Ways To Use Engraved Glass
Engraved glass can be used in a variety of creative and innovative ways, such as creating beautiful artwork, personalizing gifts, and making functional items. Here are some unique examples of how you can use engraved glass to brighten up your home or take your craft projects to the next level:
Customized Windows
Engraved glass windows are an ideal way to add a touch of elegance and privacy to any room in your home. You can use sandblasting techniques to etch patterns, intricate designs, or even personalized messages onto your window panes.
Customized windows also make for great gifts, as you can customize them with the recipient's name or a heartfelt message. And the best part is that you can customize them to fit any size or shape of the window.
Unusual Mirrors
Using engraving techniques on glass mirrors can create stunning focal points for any room. You can etch beautiful floral and abstract designs onto the surface of an ordinary mirror frame for a one-of-a-kind piece of artwork.These unusual mirrors also make for great conversation pieces, and you can even give them as gifts to friends or family members. With a bit of creativity, you can also create unique designs that will make your mirror stand out from all the rest.
Unique Gifts
Personalized engraved glass gifts such as mugs, plates, coasters, vases, and more make great presents for birthdays, weddings, anniversaries, holidays, and other special occasions. Your loved ones will appreciate the thoughtfulness behind these unique creations!
Unique gifts also make for excellent souvenirs, as you can etch a special message or design onto the item that will remind them of their time spent with you.
