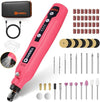
How to Use a Rotary Tool on The Wood

A rotary tool kit is a crucial piece of gear you need if you enjoy modifying or creating things. Wood can be shaped, carved, and even sanded in various ways. Furthermore, a rotary tool can be used to complete any of these tasks quickly and with excellent results. Rotary tools are often used with wood due to their advantages, such as dust-free cutting and quick, precise cuts.
Although the fundamentals are fairly simple to learn, most people who use them for wood projects need to be familiar with them. As a result, this article will guide you through the process of using the tool for woodworking. This rotary tool's ability to take advantage of the drill bit's rotation in order to make holes more easily is one of its most intriguing features. Let's, therefore, learn more about this tool.
What Is A Rotary Tool, And What Can It Do?
A rotating cutting, grinding, or sanding disc is used by rotary tools, which are electric handheld power tools, to carry out a lot of tasks. The discs can be used for many tasks, including cutting, grinding, sanding, polishing, etc. They are interchangeable. Rotary tools are extremely adaptable and can be used for many woodworking tasks.
A rotary tool is a portable power tool that can be used for many tasks. It has a rotating head with a number of adapters that can be used for additional purposes. The most popular extensions are the sanding disc, grinding wheel, and cutting wheel. Rotary tools can be used for various projects because of their versatility. Keep these tips in mind when working with rotary tools on wood.
- Always use the appropriate attachment for the job at hand.
- Second, put on the proper safety equipment, like gloves and eye protection.
- Third, be cautious and work slowly to prevent harming the wood.
1. Selecting the Right Tool for the Job
Select a cordless rotary tool that has the strength to work with the kind of wood you'll be using. Some rotary tools have variable speed controls for use with various materials and tasks. Ascertain that the tool you select can accommodate the bits required for cutting and shaping wood. Think about the brand's standing in terms of dependability, effectiveness, and client satisfaction. Select a tool that fits within your budget after determining your budget.
Look for a tool with a warranty to give yourself more peace of mind. Choose a tool with the appropriate capacity after taking into account the depth of cut you will require for your projects. Look for a tool with a dust extraction feature if you plan to work on large projects to keep your workspace tidy.

2. Gaining Familiarity With The Rotary Tool
The steps below can help you become more comfortable using a rotary tool:
To learn about the tool's features, capabilities, and restrictions, start by reading the manual. Get acquainted with the controls. Learn how to use the power button, speed control, and any other features of the tool. Utilize scrap materials to practice cutting and shaping to get a feel for the tool.
Try out different rotary tool attachments and rotary tool accessories. Experiment with different bits and attachments to learn about their capabilities and limitations. Start with small projects to get comfortable with the tool's operation and to build your confidence. Consider enrolling in a class or workshop to gain more knowledge about using a rotary tool and to pick up advice from more seasoned users.

3. Preparing the Wood for Use with the Tool
Select the proper wood, making sure it is appropriate for the project, and the type of cutting or shaping that will be done. To ensure an accurate cut, mark the cutting line on the wood with a clear mark. A vise or a clamp can be used to securely hold the wood during cutting to prevent movement. To make a smooth surface for cutting or to get rid of any rough spots, sand the wood's surface.
To prevent making an excessively deep cut that would harm the tool or the workpiece, measure and mark the depth of the cut. For a cutting process that is both safe and effective, make sure the workspace is free of any debris or obstacles.

4. Carving and Engraving Details
Use a rotary tool as directed to engrave and carve details:
Choose the right bit for the engraving or carving detail you want to create. Set the tool's speed to correspond with the task and the material. To prevent movement while cutting, clamp the wood or use a vise to hold it firmly. Make a sketch of the information you want to engrave or carve into the wood. Then, slowly move the tool along the detail line after turning it on. To ensure a clear and accurate cut, apply steady, even pressure to the tool.
The tool must be turned off before being removed from the workpiece. To remove burrs or rough areas, sand or file the edges. To produce the desired details, repeat the process as necessary. When using a rotary tool, always wear safety goggles and earplugs.

5. Sanding And Finishing With A Rotary Tool
Choose the right sanding attachment for the job. Match the tool's speed to the task and the material. To stop the wood from moving while it is being sanded, clamp it or secure it with a vise. Start sanding in one direction and go with the grain of wood. To avoid harming the wood, use the tool lightly.
For a smoother finish, start with coarse grit sandpaper and gradually move up to finer grit. To ensure a clean surface, frequently wipe away sanding dust. Complete your sanding with fine-grit paper for a polished and smooth surface. To protect and improve the wood, apply the finish of your choice. When working with the best rotary tool, always wear eye and ear protection.
6. Safety Considerations for Using a Rotary Tool on Wood
Wearing a dust mask is essential when using a mini rotary tool on wood because wood dust poses a health risk. When using a rotary tool, it's crucial to wear clothing that fits snugly because loose clothing can become entangled in the moving parts.
Ensure your workpiece is firmly clamped or held in place to keep it from moving while cutting. To protect yourself from being hurt by the rotary tool, keep your hands away from the cutting area. Ensure your cutting speed is appropriate for the bit you are using and the type of wood you use.
To prevent accidental restarts, disconnect the rotary tool from the power source before changing the bit. Always adhere to the manufacturer's instructions to ensure safe and efficient use when using a rotary tool on wood. Utilizing a rotary tool on wood can be successful and enjoyable if you take these safety precautions to minimize the risk of injury.
7. Tips For Successful Projects With A Rotary Tool And Wood
- Invest In The Appropriate Tools First
Invest in a rotary tool of superior quality and various bits and accessories made especially for woodworking.
- Make Sure You Are Wearing The Appropriate Safety Equipment
It's crucial to put on protective eyewear, gloves, and a dust mask when working with rotary tools and wood.
- Project Planning
Spend time planning your project and creating a comprehensive list of all the necessary supplies and equipment.
- Follow The Grain
Always work with the grain of the wood when using a rotary tool on wood to avoid splintering.
- Observe A Model
A guide can assist you in maintaining control of your best cordless rotary tool and preventing it from straying from the cutting line.
What Kind Of Wood Ought To Be Cut With A Rotary Tool?
Several different types of wood can be worked with a rotary tool. However, different types of wood require different skill levels to work with. It's simpler to cut and sand softer woods like pine or cedar. Using a different attachment or more patience may be necessary when working with harder woods, like oak or maple, because they are more difficult to work with.
To protect the wood, take your time and move slowly. Start by ensuring the cutting blade is sharp and situated correctly before cutting any wood. Guide the blade along the desired cutting line next by moving slowly and carefully. The blade may start to wander toward the end of the cut, so take your time and be extra cautious.
If sanding wood, begin by connecting the rotary tool's sanding pad to it. When the tool is ready, please turn it on and move the tool slowly across the wood's surface. Make sure to exert even pressure and move in a predictable direction.
Add the polishing pad to the rotary tool and finish polishing the wood. Then turn on the tool after adding polish to the pad. Maintain a steady motion as you slowly move it across the wood's surface. When polishing, use even pressure, and don't forget to buff off any extra polish.
