Get Started With Woodcarving: A Beginner's Guide

Woodcarving is a rewarding and enjoyable hobby that allows you to create beautiful pieces of art out of wood. It’s an ancient craft that has been practiced for centuries, but with the advent of modern tools such as cordless rotary tools, it’s now easier than ever to get started.
To help you get started on your woodcarving journey, we’ve put together this guide on how to choose the best cordless rotary tool for your needs.
We'll cover what features are important when choosing a rotary tool, as well as our top picks for beginners and experienced carvers alike. So let's dive in!
Materials And Tools

- Different types of wood and their properties
- Necessary tools such as chisels, gouges, knives, and mallets
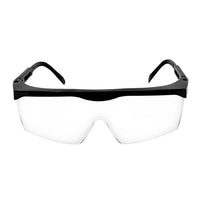
- Safety equipment like gloves and goggles
Techniques And Tips
When it comes to carving wood, the basics are essential for achieving a successful end result. It’s important to understand grain orientation, tool handling, and sharpening techniques.
Grain Orientation: When selecting your piece of wood, take a close look at the grain and identify which direction it goes in. This will determine how you approach your cuts - cutting with or against the grain can drastically affect the outcome of your project.
Tool Handling
It’s important to always handle tools correctly to ensure that they are safe to use and won't cause any harm or injury. Always keep your blades sharpened and covered when not in use, as dull blades can lead to accidental slips that could cause injury or damage. Make sure to also wear protective equipment such as gloves and goggles when using these tools.
Sharpening
Sharpening tools is an important part of woodcarving and should be done regularly for best results. You should invest in stone sharpeners designed for rotary tools, as well as honing guides if you plan on doing more intricate work with knives and chisels.
It's also important to remember that the sharper your blade, the easier it will be to carve without putting too much pressure on the wood itself – resulting in a better-looking finished product!
Relief Carving
Relief Carving is a type of woodcarving where designs are carved into the surface of a piece of wood. This technique is often used to create signs, plaques, and decorative panels. Relief carving starts by sketching out the desired design onto the wood with a pencil or marker, followed by using chisels, knives, gouges, and other specialized tools to carve away at the surface until the desired shape is achieved.
In-the-Round Carving
In-the-Round Carving involves creating sculptures that are three-dimensional in nature. These sculptures can range from small figurines to large statues. This technique requires a greater level of skill as it can be difficult to make precise cuts in order to achieve round shapes and details.
Chip Carving
Chip Carving is a popular technique used in making decorative boxes, frames, plaques, furniture parts, and many other items. It involves cutting away small pieces (or chips) of wood around an outline drawn onto a piece of wood in order to create intricate patterns and designs.
Tips For Creating Intricate Designs And Finishing Projects
Creating intricate designs and finishing projects with woodcarving requires a great deal of skill and concentration. The key is to take your time, think carefully about the design, and be aware of how each cut will affect the overall outcome. Here are some tips for achieving intricate designs:
- Practice standard carving techniques such as relief carving, in-the-round carving, and chip carving to gain experience with basic shaping methods before attempting more complex patterns.
- Use a light hand when cutting into the wood and make sure to use sharp tools that can easily carve away small pieces without rough edges.
- Hold the tool at an angle to create deep cuts or shallow grooves in the wood, which will help create more detail in your design.
- Start with larger details first and work your way towards smaller ones as you progress – this will help keep your focus on creating intricate designs instead of getting overwhelmed by them.
- Take breaks throughout the process to give yourself time to step back and assess your progress. This will also help you maintain accuracy when working on detailed areas of your design.
- Once you’ve completed the carving portion of your project, use sandpaper to smooth out any rough edges or inconsistencies in the shape of the piece before applying a finish or sealant.
- Finishing products such as shellac or wax can enhance the color and texture of the wood while also protecting it from moisture damage over time.
Projects For Beginners
Many woodcarvers prefer to begin with simple projects, such as carving a spoon or letter opener, before attempting more complex designs. This way, they can learn the basics of the craft and gain the necessary skills before tackling more challenging pieces. Here are some tips for creating a simple project that will help beginners get started in woodcarving:
- Choose a piece of wood that is easy to carve. Softwoods such as pine, basswood, and poplar are generally easier to work with than hardwoods like walnut or cherry. The size and shape of the wood should also be taken into consideration – for small projects such as spoons or letter openers it is best to use pieces that are relatively thin and wide in order to allow for easier maneuvering around curves and edges.
- Draw an outline of your desired shape on the piece of wood using a pencil or marker – this will help you stay on track once you start carving away at the surface. If you are feeling particularly ambitious, you can trace a pre-existing design onto the wood as well!
- Begin by lightly outlining your design with a knife or chisel – making sure not to apply too much pressure so that you don’t accidentally chip away at other parts of the wood while shaping your project.
- Use smaller tools such as micro chisels and palm tools for fine detail work around curves and edges in order to achieve more intricate patterns.
- Once your project is complete, use sandpaper to smooth out any rough edges or inconsistencies in its shape before applying a finish or sealant in order to protect it from moisture damage over time. Finishing products such as shellac or wax can also enhance the color and texture of the wood while adding extra protection against wear and tear due to regular usage.
Tips For Selecting The Right Project And Carving Kit For Beginners
When selecting a project or carving kit for beginners, there are a few important tips to keep in mind.
- Start with smaller projects that have minimal detail work and curves. This will help you get accustomed to the tools and techniques of woodcarving without feeling overwhelmed or frustrated with more complicated designs.
- Choose a project that is within your skill level – look for kits or plans designed specifically for beginners as they will typically provide basic instructions and simplified patterns suited to those just starting out in the craft.
- Opt for kits that include all the necessary tools and materials needed to complete the project. This will save time and money by ensuring that you have everything you need on hand when beginning the task.
- Consider buying an individual set of woodcarving tools if you plan on doing more than one project, as this will allow you to refine your technique and practice more intricate designs over time without needing to buy additional supplies each time.
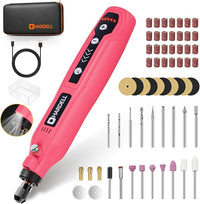
- Be sure to purchase quality tools from reputable manufacturers – low-grade implements may not give precise results or last very long, while high-quality ones can be relied upon to produce precise results over many uses and years of use.In that case, Hardell Corded Engraver would be the appropriate tool.
Following these simple tips should make it easier for beginners to find a suitable project or carving kit that allows them to learn the craft in an enjoyable way without feeling overwhelmed or frustrated by overly complex designs too soon!
Resources And Inspiration
For those looking to learn more about woodcarving, there are a variety of books, videos, and online resources available. Here are some suggestions for furthering your knowledge of the craft:
Books

For beginners looking to gain an understanding of the basics of woodcarving, “The Complete Guide to Woodcarving” by Richard Butz provides detailed step-by-step instructions for creating a variety of traditional and modern projects.
Other classic titles include “Woodcarving Illustrated” by Chris Pye and “The Art of Woodcarving” by David E. Krepcio.
Videos
A number of YouTube channels offer instructional videos on woodcarving techniques and projects. These range from simple beginner tutorials to more advanced lessons in carving intricate designs.
Popular channels include the Wood Whisperer with Marc Spagnuolo and Carving School with Vinny Dudek.
Online Resources
Various websites provide resources for woodworkers, including tips and tricks for successful carving as well as forums for discussing projects and sharing experiences. Popular destinations include practical-wood-working.com, woodworkforums.com, and fine-woodworking.com.
Conclusion
Woodcarving is a rewarding and fulfilling craft that can be enjoyed by people of all ages. With the right tools, plans, and resources at your disposal, you’ll soon find yourself creating beautiful works of art from wood. Whether it’s a small project or an intricate design, these tips will help beginners get started with their own unique projects in no time!
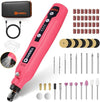
By investing in quality rotary tools such as cordless models or mini rotary tool kits to ensure precision results over many uses, you'll have everything you need for successful carving sessions. So go ahead and start exploring this timeless hobby – let your creativity flow into something truly special!
