


18 Ways to Use Your Rotary Tool

Home repairs can be a nightmare if you don't have the proper tool for the job. Door latch stop functioning? A bad repair was made to a bathroom faucet? Dishwasher rack that is broken? The all-purpose rotary tool is a well-kept secret among seasoned handymen. You don't want to transport your toolbox without it because it is the ultimate multipurpose DIY tool. A rotary tool can be used in a lot of ways and is a strong and versatile tool.
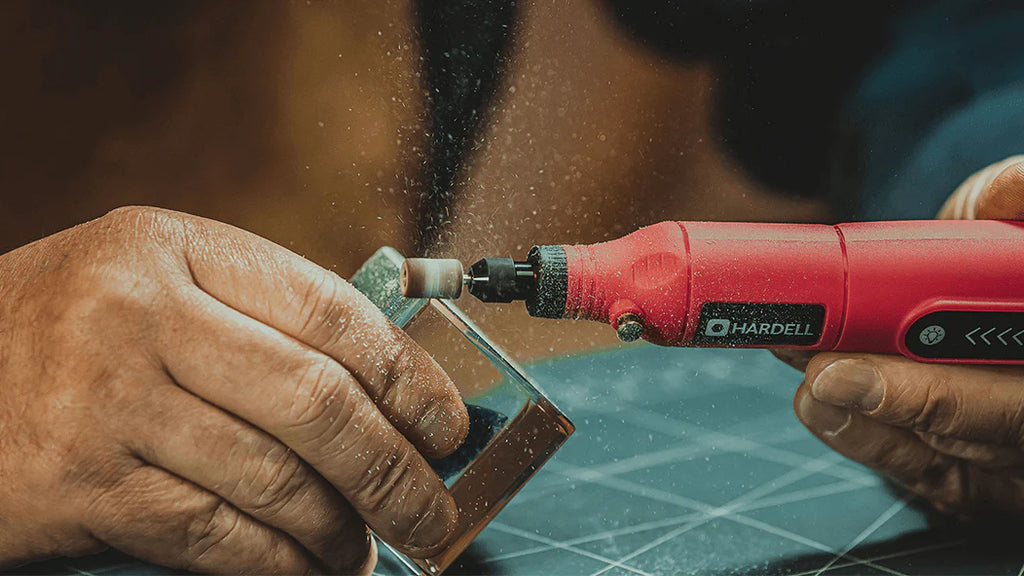
A rotary tool's internal electric motor spins a shaft with cutting bits on end to sever tough materials like wood, metal, plastic, stone, etc. Sanding attachments are also available to polish rough surfaces to a lovely finish and to smooth out their edges. This power hand tool's versatility makes it one of the most popular tools in any carpenter's arsenal. Let's know the popular ways to use your rotatory tools.
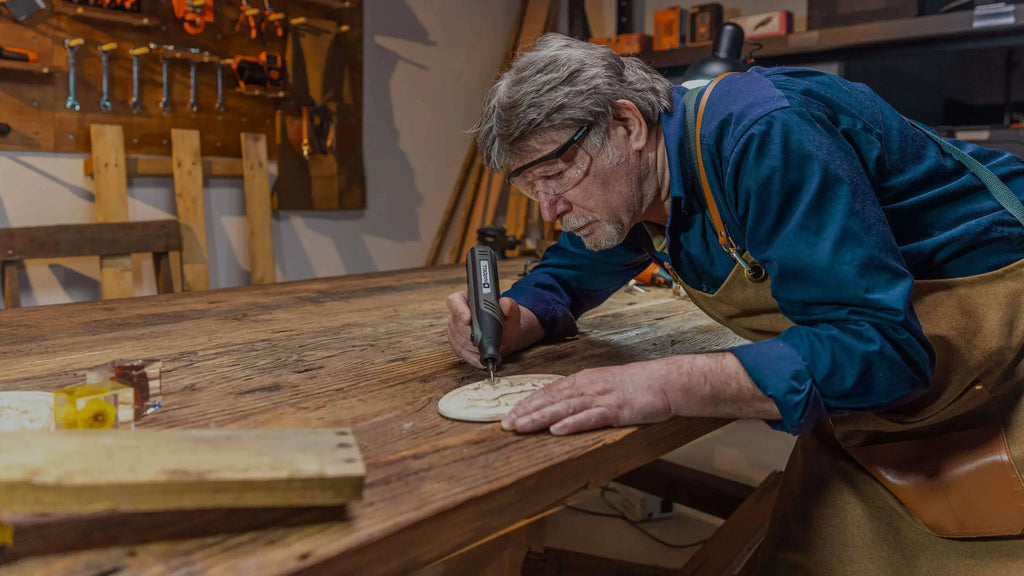
1. Create Intricate Detail Work
A rotary tool can be used to complete intricate detail work by using specialized accessories like micro drill bits, routing attachments, and engraving attachments. Thanks to these attachments, the rotary tool can access small areas and precisely complete delicate work. These minuscule drill bits are created for fine drilling in small, delicate materials like jewelry, electronic parts, and model airplanes.
Routing tools like ball noses and V-groove bits are excellent for forming complex patterns and shapes in a lot of materials. They may be trimmed, inlaid, and routed decoratively. To etch designs and lettering onto a lot of surfaces, including metal, glass, and plastic, engraving attachments like diamond-tip engraving bits are used. These add-ons make it simple for the user to make exact, complex designs.
When using a rotary tool for minute detail work, it's crucial to use the right accessories and adhere to safety precautions. It is also advised to work slowly and steadily to prevent errors to get the best results.
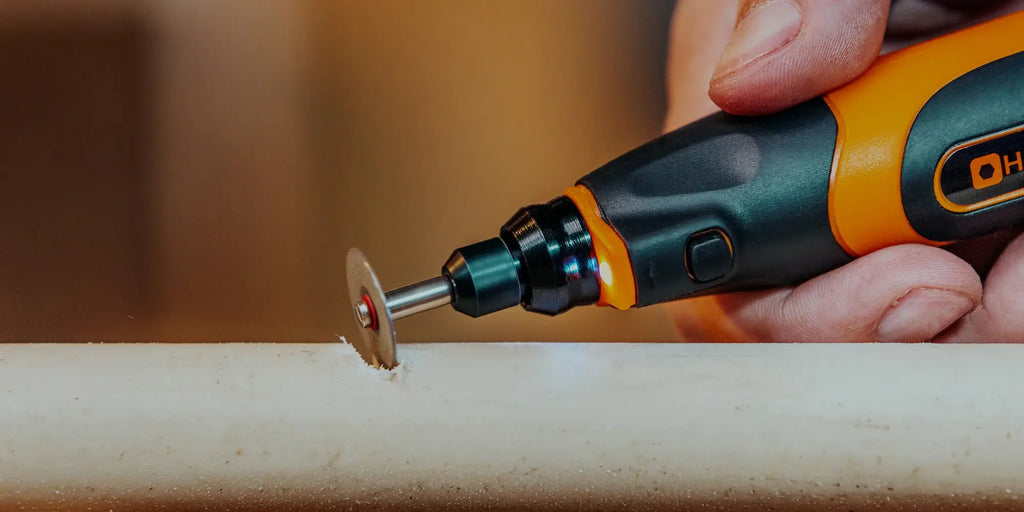
2. Cut and Shape Wood and Metal
Using different attachments for cutting, grinding, and sanding, a cordless rotary tool can be used to cut and shape both metal and wood. A rotary tool can be used in the following ways to cut and shape metal and wood:
To make accurate cuts in wood, use a wood-cutting blade attachment. For instance, it can be used to trim undesirable portions or cut grooves. To cut through metal, use an attachment for a metal cutting wheel. To protect the rotary tool and the workpiece, make sure to use the appropriate cutting wheel for the type of metal you are cutting.
Sand off rough edges and shape wood into the desired shapes using sanding and shaping attachments. For instance, use a shaping disk to carve intricate designs or a sanding drum to smooth over the edges.
To shape metal, use a metal cutting wheel or a grinding stone. Burrs can be removed from edges and sharpened using grinding stones, and metal can be cut to size or shaped using metal cutting wheels.
When cutting and shaping metal and wood with a rotary tool, it's crucial to always use the correct accessories and adhere to safety precautions. Working slowly and steadily will help you avoid mistakes and produce the best results. Using the correct eye and hearing protection is also essential when using a rotary tool.
3. Sharpen Tools and Knives
Using a grinding stone attachment to the best cordless rotary tool, you can sharpen a variety of implements and knives. To sharpen something, follow these instructions:
If you want to sharpen a tool or knife, choose a grinding stone that is suitable for it. Use a fine stone to sharpen the edge and a coarse stone to dull polish blades, for instance. To keep it secure while sharpening, clamp the tool or knife in a vise or use a tool holder.
Start with slow, steady strokes, turn on the rotary tool and grind the tool or knife's edge at the proper angle. Check the sharpness of the tool or knife's edge after a few strokes by using your thumb or a honing rod. If it isn't sharp enough, keep grinding until you get the desired level of sharpness.
Polish the edge and eliminate any burrs using a finer grinding stone. Always use eye and hearing protection when using a rotary tool for sharpening, and be careful not to apply too much pressure as this could harm the tool or the blade.
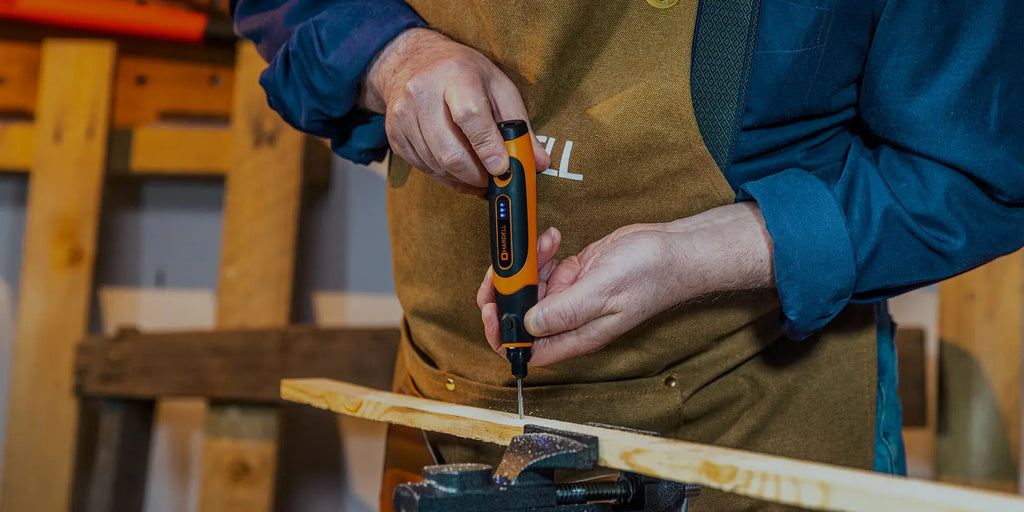
4. Make Precision Drilling Easier
When using a rotary tool, precision drilling can be made simpler by utilizing drill bits specially crafted for various materials and applications. Rotary tools can be used in a few different ways to drill precisely.
Drilling tiny, delicate holes in materials like jewelry, electronic parts, and model airplanes require the use of micro-drill bits. Step drill bits are made to progressively drill larger holes into materials, making it simpler to achieve the desired size without having to change to a larger drill bit.
Concrete, brick, and other masonry materials can all be drilled with masonry drill bits. To increase their durability and cutting performance, titanium nitride is coated on drill bits that are made specifically for drilling into metal.
Align the rotary tool for accurate drilling by using movable drill guides. The risk of the drill bit breaking or the workpiece being harmed is decreased thanks to these guides, which also help keep the drill bit straight. When using a rotary tool to drill, it's critical to use the right drill bit for the material you're working with, maintain the tool's proper angle, and drill steadily.
5. Polishing and Sanding Projects
With the aid of specialized polishing and sanding attachments, rotary tools can be used for projects requiring polishing and sanding. A rotary tool can be used in the following ways to polish and sand:
Sand uneven surfaces and remove paint or rust by using sanding discs. For various sanding applications, sanding discs come in a range of grits. Polishing wheels should be used to buff and shine plastic and metal surfaces. There are many different types of materials and grits of polishing wheels for various polishing applications.
Combine buffing compounds with polishing wheels to improve the shine on metal and plastic surfaces. Use a sanding drum to smooth out edges and form curves on metal and wood. Rust, paint, and other debris can be removed from metal surfaces using a wire brush attachment.
Starting with a low speed and gradually increasing it as necessary is crucial when using a rotary tool for polishing and sanding. Always use protective gear for your eyes, ears, and hands to prevent damaging the workpiece.
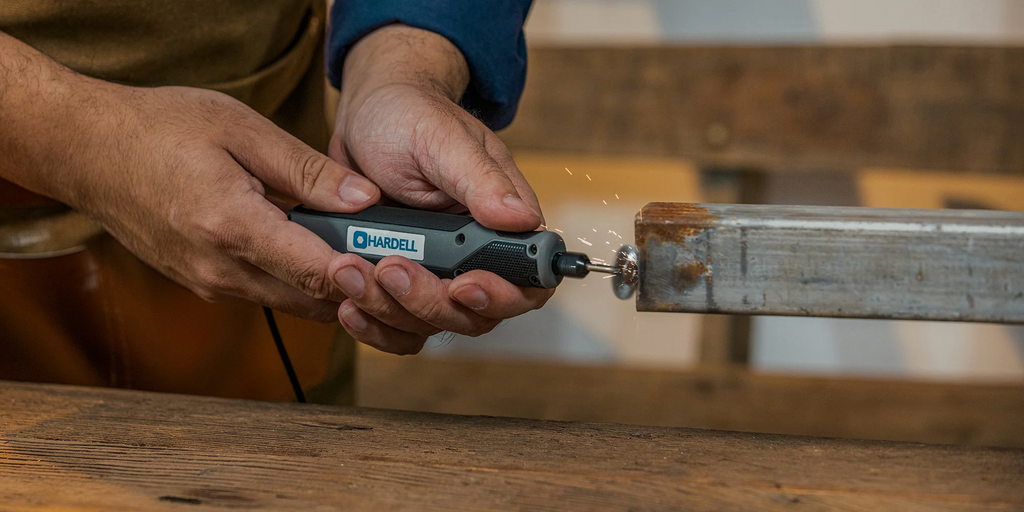
6. Clean Rust and Paint
Rust and paint can be removed with a rotary tool and specialized wire brush attachments. Here's how to use a rotary tool to remove paint and rust:
Choose a wire brush attachment that is suitable for the kind of surface you're cleaning. Use a steel brush for tougher tasks and a brass brush for delicate surfaces, for instance. For security, while cleaning, clamp the workpiece in a vise or use a tool holder. Start by turning on the rotary tool and lightly brushing the surface of the workpiece while moving in a circular motion. Check the workpiece's surface after a few passes to see if the paint and rust have been eliminated. If not, keep brushing until the surface is completely clean.
After cleaning the surface, use a clean cloth to wipe away any remaining dirt. When using a rotary tool to remove paint and rust, it is important to always wear protective eye and ear gear. You should also be careful not to use excessive pressure, as this could harm the workpiece.
7. Engrave and Etch Glass
Glass can be engraved and etched using rotary tools that are designed for those purposes. For the type of design you want to produce, choose an engraving bit with a diamond or carbide tip. Mark the pattern you want to engrave onto the glass with a pencil. To keep the glass from moving during engraving, clamp it firmly in a vise or use a tool holder. Start the best cordless rotary tool, engrave the design using light pressure, and go slowly.
Verify the design is coming out as intended by inspecting it after each pass. The rotary tool's pressure and speed should be adjusted as necessary. Clean the glass with a fresh cloth to remove any debris after the design is finished. When using a rotary tool to engrave or etch glass, it is always advisable to wear protective eye and ear gear. You should also take care not to use excessive pressure, as this can harm the glass.
8. Carve and Engrave Stone
Stone can be carved and engraved using a rotary tool and specialized diamond tip carving and engraving bits. Choose a carving or engraving bit with a diamond tip that's appropriate for the kind of stone you're working with and the design you want to produce. With masking tape or other suitable materials, position the stone on a flat surface and fix it there.
By using light pressure and moving slowly and steadily, turn on the rotary tool and start carving the stone. Check the design after a few iterations to ensure it is coming out as you had hoped. Alternatively, modify the tool's pressure and speed as necessary.
9. Create Patterns and Designs
Wood, metal, glass, and stone are just a few of the materials that can be patterned and designed with a rotary tool. When choosing a rotary tool bit, consider the type of material you'll be working with and the design you want to achieve. The workpiece should be laid out flat and held in place with masking tape or other suitable materials.
You can use a template or a pencil and paper to sketch out the design you want to make. Lightly press down while working slowly and steadily to create the design as the rotary tool is turned on. Check the design after a few iterations to make sure it is coming out as you had hoped. If not, alter the tool's speed and pressure as necessary.

10. Cut Ceramic Tiles and Glass
For the type of material you are cutting, choose a suitable diamond tip cutting bit (ceramic tile or glass). Using masking tape or other suitable materials, set the ceramic tile or glass on a flat surface and secure it there. The ceramic tile or glass surface should be measured, and the cutting line should be marked.
Starting with light pressure and moving slowly and steadily, turn on the rotary tool and cut along the marked line. Check to see if the cut is coming out as you had hoped for after a few passes. Alternatively, alter the tool's pressure and speed as necessary. Remove the masking tape and use a clean cloth to remove debris from the ceramic tile or glass surface after the cut is finished.
11. Groove and Cut Hinges
When installing a door, the hinges should be your top priority. The hinges must first be removed in order to install the door properly. Doing otherwise will make your straightforward project more difficult. Both experts and beginners use the Rotary tool, a multipurpose handheld power tool.
When used with the plunge router attachment, the Rotary tools transform into a surface router that can handle the detail of many small jobs. Installing door hinges is a simple, efficient process when using the mini rotary tool. If you want to install your door yourself, you will need a basic understanding of the equipment and procedures.
12. Create Custom Signage
Choose a cutting or engraving bit that is suitable for the kind of material you're working with (metal, for instance) and the kind of groove or cut you want to make. Use masking tape or other suitable materials to fix the hinge in place after placing it on a flat surface.
Take measurements on the hinge's surface and mark the cutting or groove line. Lightly press along the marked line while moving slowly and steadily with the rotary tool, then turn it on. Check the cut or groove to make sure it is coming out as you want it to after a few passes. Alternatively, modify the tool's pressure and speed as necessary.

13. Carving and Gouging Wood
It is important that the carving or engraving bit you select is appropriate for the carving or gouging you intend to do. Use masking tape or other appropriate materials to secure the wood there after you've laid it out on a flat surface.
Create a sketch of the carving or gouge pattern on the wood, or use a template to serve as your guide. Start the rotary tool, put a little pressure on it, and gouge or carve while moving slowly and steadily. After a few passes, check to see if the carving or gouge is shaping up as you had hoped. If not, adjust the pressure and speed of the cordless rotary tool as necessary.

14. Create Intricate Inlays
Choose a cutting or engraving bit that's appropriate for the kind of material you're working with (such as wood) and the kind of inlay you want to make. The workpiece should be secured by placing it on a flat surface and holding it there with tape, glue, or other suitable materials.
Plan the inlay: Draw out the inlay pattern on the workpiece, or use a template to help you get started. Cut the Inlay Cavity and Start the rotary tool, then carefully cut the inlay cavity by the marked pattern. Preparing the inlay material involves cutting it to the appropriate size and shape so that it can be inserted into the cavity with precision. Carefully insert the inlay material into the cavity, making sure it is level and secure.
15. Remove Grout and Residue
For grout removal, pick a pointed or diamond-tipped bit, and pick a wire brush bit for residue removal. To stop the surface, you are working on from slipping during removal, clamp or hold it. Start out moving slowly and pick up speed as you need to. To avoid scratching the surface, keep the tool moving steadily and consistently.
Working from one end to the other, scrub the grout or residue using the tool. After removing the grout or residue, thoroughly clean the area with a cleaning solution or water. Repeat the procedure as necessary until all grout or leftovers have been eliminated.
16. Create Perfect Holes and Shapes
A drill bit for holes, a cutting wheel for straight cuts, or a sanding drum for curves is some examples of appropriate bits to choose from depending on your desired result. Hold or clamp the material you're working with to keep it stable while drilling or cutting.
Start out moving slowly and pick up speed as you need to. To prevent making holes or cuts that are uneven, keep the tool moving steadily and consistently. Use templates, stencils, or rulers to ensure that your cuts or holes are precise and even. To ensure straight cuts and holes, maintain a 90-degree angle with the material.

17. Adjust and Repair Jewelry
Pick the appropriate bit for the task at hand, such as a shaping cutting wheel, a smoothing polishing tip, a sanding drum, or a grinding stone. Secure the jewelry with a clamp or other holding mechanism to prevent it from moving while being repaired. Start out slowly and increase your speed as needed.
Keep the tool moving steadily and at a constant speed to avoid creating damage or uneven shapes. Use templates or rulers to make sure your cuts or shapes are precise and uniform. To maintain control and accuracy, use a light touch and keep the tool perpendicular to the jewelry. Clean and polish the jewelry once the repairs are complete.
18. Customize and Personalize Items
Keep the item you're working on from moving while you customize it, clamp, or hold it. Start out moving slowly and pick up speed as you need to. To prevent uneven a cut or uneven shapes, keep the best rotary tool moving steadily and at a constant speed. Use templates, stencils, or rulers for even and precise cuts and shaping.

